


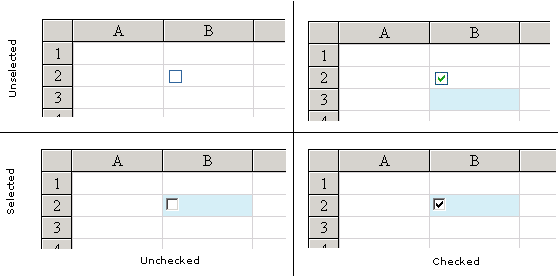
A check box cell displays, by default, a small check box that can have one of two states, checked or unchecked. You can customize the check box by specifying the images for the two states. You can also specify whether the value is Boolean (true or false) or an integer (0 or 1). Default appearances are shown here.
To create a cell that acts like a check box, follow this procedure.
For details on the properties and methods for this cell type, refer to the CheckBoxCellType class in the Assembly Reference.
Return to the overview of graphical cell types at Working with Graphical Cell Types.
Using Code
- Define the check box cell type by creating an instance of the CheckBoxCellType class.
- Specify the properties of the check box cell.
- Enter the text that goes along with each check box.
- Specify the location of the images for the checked and unchecked boxes if you do not want to use the defaults.
- Assign the check box cell type to a cell (or cells).
Example
This example creates a check box cell with custom images and text.
| C# |  Copy Code Copy Code |
|---|---|
FarPoint.Web.Spread.CheckBoxCellType chkbx = new FarPoint.Web.Spread.CheckBoxCellType(); chkbx.Text = "Spotted"; chkbx.CheckedImageUrl = "img/checked.gif"; chkbx.UncheckedImageUrl = "img/unchecked.gif"; FpSpread1.ActiveSheetView.Cells[0, 0].CellType = chkbx; |
|
| VB | Copy Code |
|---|---|
Dim chkbx As New FarPoint.Web.Spread.CheckBoxCellType() chkbx.Text = "Spotted" chkbx.CheckedImageUrl = "img/checked.gif" chkbx.UncheckedImageUrl = "img/unchecked.gif" FpSpread1.ActiveSheetView.Cells(0, 0).CellType = chkbx |
|
Using the Spread Designer
- In the work area, select the cell or cells for which you want to set the cell type.
- Select the Home menu.
- Select the SetCellType icon under the CellType section.
- Select the cell type and any other cell properties.
- Select OK to close the dialog.
- Click Apply and Exit to close the Spread Designer.