


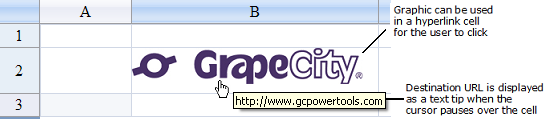
A hyperlink cell displays either text or an image that can serve as a hyperlink when clicked. The destination universal resource locator (URL), sometimes called the address, in the hyperlink can be any valid URL, such as www.yoursite.com or emailto:support@fpoint.com. For up-level browsers that support it, a text tip appears with the destination URL when the cursor pauses over the hyperlink cell. For down-level browsers, the status bar displays the URL when the cursor is over the link.
You can specify the target in which to display the destination, for example a new window (target = "_blank") or the same window (target= "_self"). For other types of buttons, refer to Setting a Button Cell.
To create a cell that acts like a hyperlink, follow the procedure described here.
For details on the properties and methods for this cell type, refer to the HyperLinkCellType class in the Assembly Reference.
Return to the overview of graphical cell types at Working with Graphical Cell Types.
Using Code
- Define the hyperlink cell type by creating an instance of the HyperLinkCellType class.
- Choose the graphic, if you are making a hyperlink with a graphical image, and make sure the graphic file is in the correct directory and is the correct file type for the browser to display it.
- Set the size of the cell, if you want it to match the size of a graphic to be used in the hyperlink or set the text that appears in the cell.
- Specify the destination URL for the hyperlink. You can optionally set the target.
- Assign the hyperlink cell to a cell (or cells).
Example
This example sets the size of the cell (by column and row) so that the graphic fits in it, then defines the location of the graphic to use as a hyperlink button, then specifies the destination URL (and has it opening is a separate window).
| C# |  Copy Code Copy Code |
|---|---|
FpSpread1.ActiveSheetView.Columns[1].Width = 145; FpSpread1.ActiveSheetView.Rows[1].Height = 45; string linkImage = @"images\fplogo.jpg"; string linkURL = "http://www.gcpowertools.com"; string linkTarget = "_blank"; FarPoint.Web.Spread.HyperLinkCellType linkcell = new FarPoint.Web.Spread.HyperLinkCellType(); linkcell.ImageUrl = linkImage; linkcell.NavigateUrl = linkURL; linkcell.Target = linkTarget; FpSpread1.ActiveSheetView.Cells[1, 1].CellType = linkcell; |
|
| VB | Copy Code |
|---|---|
FpSpread1.ActiveSheetView.Columns(1).Width = 145 FpSpread1.ActiveSheetView.Rows(1).Height = 45 Dim linkimage As String = "images\fplogo.jpg" Dim linkURL As String = "http://www.gcpowertools.com" Dim linkTarget As String = "_blank" Dim linkcell As New FarPoint.Web.Spread.HyperLinkCellType() linkcell.ImageUrl = linkImage linkcell.NavigateUrl = linkURL linkcell.Target = linkTarget FpSpread1.ActiveSheetView.Cells(1, 1).CellType = linkcell |
|
Using the Spread Designer
- In the work area, select the cell or cells for which you want to set the cell type.
- Select the Home menu.
- Select the SetCellType icon under the CellType section.
- Select the cell type and any other cell properties.
- Select OK to close the dialog.
- Click Apply and Exit to close the Spread Designer.