


You can allow the user to drag and move rows or columns. Set the AllowRowMove property to allow the user to move rows and the AllowColumnMove property to allow the user to move columns. If you wish to allow the user to move multiple rows or columns, also set the AllowRowMoveMultiple or AllowColumnMoveMultiple property.
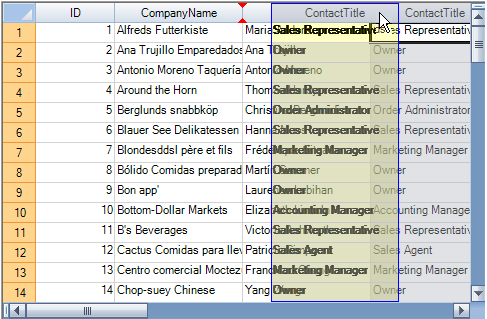
For the user to move rows or columns, they simply left click on the header of the row or column to move and drag the header back or forth over the header area and release the mouse over the header of the desired destination (for multiple rows or columns, select them first). The row or column that is being moved is shown in a transparent clone attached to the pointer, as shown in this figure, where the fourth column is being moved to the left.
Moving the Row or Column in Code
To programmatically relocate a row, use the SheetView.MoveRowmethod; to remove multiple rows at a time, use the SheetView.RemoveRows method. To programmatically relocate a column, use the SheetView.MoveColumn method; to remove multiple columns at a time, use the SheetView.RemoveColumns method. If you are familiar with the models, you can use the DefaultSheetAxisModel.Move method.
You can use the GetColumnFromTag method to find columns based on their Tag property, which you can set programmatically to whatever you wish, and similarly the GetRowFromTag method for rows.
You should be able to remove more than one column at a time using the Remove method on a range of columns or rows. For example,
FpSpread1.Sheets(0).Columns(1,5).Remove()
Return to Allowing User Interaction with Rows and Columns.
Using the Properties Window
- At design time, in the Properties window, select the Spread component.
- In the Misc category, select the AllowRowMove or the AllowColumnMove property.
- Click the drop-down arrow to display the choices and select the value (True or False). Repeat this for each property.
Using Code
Set the AllowRowMove or AllowColumnMove property for the FpSpread component.
Example
| C# |  Copy Code Copy Code |
|---|---|
fpSpread1.AllowRowMove = true; fpSpread1.AllowColumnMove = true; |
|
| VB | Copy Code |
|---|---|
FpSpread1.AllowRowMove = True FpSpread1.AllowColumnMove = True |
|
Using the Spread Designer
- Select Spread from the drop-down combo list located on the top right side of the Designer.
- From the Misc section, select True or False for AllowRowMove or AllowColumnMove.
- From the File menu, select Save and Exit to save the changes.