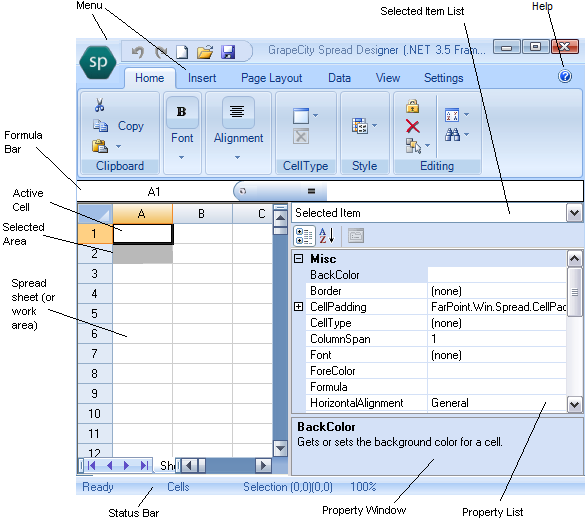
While not a comprehensive summary of every part of the Spread Designer user interface (UI), this brief overview points out a few of the main parts of the interface and shows you the basic layout of the Spread Designer. There is more than one way of doing many of the design actions. The goal of the interface is to allow you to quickly and easily set the appearance of the spreadsheet and customize the interaction that the user has with the spreadsheet.
The Spread Designer provides the following interface for designing your component.

The following topics describe some of the parts of the Spread Designer UI.
- Spread Designer Menus
- Spread Designer Toolbars (including the Formula Bar)
- Spread Designer Data Area
- Spread Designer Property Window
- Spread Designer Status Bar
For information about the dialog boxes and editors, refer to Spread Designer Dialogs and Spread Designer Editors.
You can obtain help for using Spread Designer by selecting Help from the Help menu icon, or by clicking the Help button in some dialogs.
If you are using the Properties list, you can press F1 to obtain the help topic for whichever property is selected in the list. You can also press F1 while an object is selected, such as a cell, to obtain the help for that object. For example, if a cell is selected and you press F1, the help displays the Cell class help topic.
Remember that the Properties list refers to the properties of the overall component, sheet, row or column, or even individual cell, depending on what is selected. Properties of shapes are edited in separate dialogs. For more information about shapes, refer to Designing Shapes.


