You can customize the style of header cells if you want to change the default appearance. You can use any of several ways:
- change style properties of the header classes
- customize the members of the renderers
- change properties of the default header classes
Customizing Header Styles
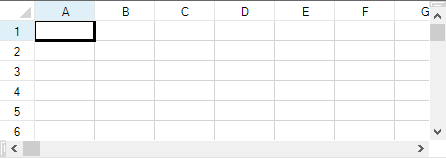
Set the default style of the header cells by setting the RowHeader DefaultStyle property or the ColumnHeader DefaultStyle property. For more information on what can be set, refer to the StyleInfo object and the RowHeader and ColumnHeader objects.
| Before |
|
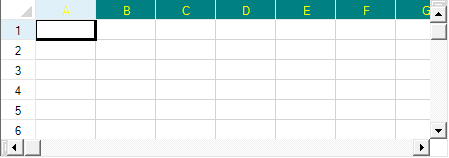
| After |
|
Customizing Header Renderers
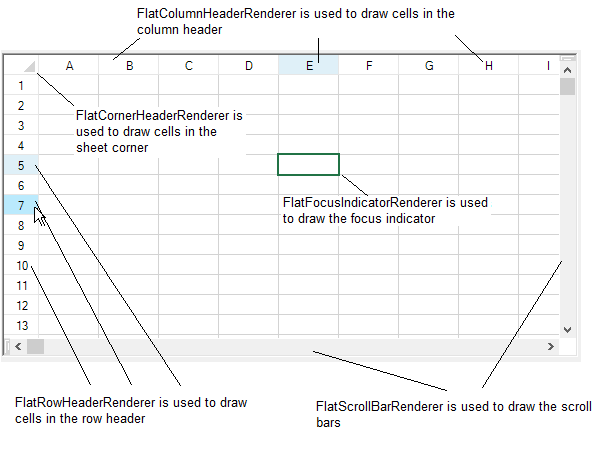
You can use the renderers (and their members) to customize the appearance of headers. The renderers used in the Office2013 style are shown in the figure and listed below.

Customizing Default Classes
You can also customize many of the header appearance properties by setting the properties of the Columns.DefaultColumn class and the Rows.DefaultRow class.
Customizing Grid Lines in Headers
You can also set the grid lines around the header cells to change the three-dimensional appearance. Refer to Customizing the Header Grid Lines.
Customizing Gradients in Headers
You can also add gradients to the header cells. Refer to Adding a Gradient to Header Cells.
Using a Shortcut
- To change the style for the column header, define a style and then set the ColumnHeader object DefaultStyle property.
- To change the settings for the row header, define a style and then set the RowHeader object DefaultStyle property.
Example
This example code defines a style with new colors and applies it to the column header as shown in the figure in this topic.
| C# |
Copy Code
|
|---|---|
fpSpread1.VisualStyles = FarPoint.Win.VisualStyles.Off; // Define a new style. FarPoint.Win.Spread.StyleInfo darkstyle = new FarPoint.Win.Spread.StyleInfo(); darkstyle.BackColor = Color.Teal; darkstyle.ForeColor = Color.Yellow; // Apply the new style to the column header of a sheet. fpSpread1.ActiveSheet.ColumnHeader.DefaultStyle = darkstyle; |
|
| VB |
Copy Code
|
|---|---|
FpSpread1.VisualStyles = FarPoint.Win.VisualStyles.Off ' Define a new style. Dim darkstyle As New FarPoint.Win.Spread.StyleInfo() darkstyle.BackColor = Color.Teal darkstyle.ForeColor = Color.Yellow ' Apply the new style to the column header of a sheet. FpSpread1.ActiveSheet.ColumnHeader.DefaultStyle = darkstyle |
|

