The ActiveReports 9 Server installation includes a security provider sample that you can find in:
C:\ActiveReports 9 Server\SDK\ActiveTunes.SecurityProvider
To open the solution, double-click the ActiveTunes.SecurityProvider.sln file.
| Sample Project | Description |
|---|---|
| ActiveTunes.SecurityProvider | Shows how you can provide proprietary or single-sign-on authentication instead of the built-in ActiveReports 9 Server security and use row-level security. |
| ActiveTunes.SecurityProvider.UnitTests | Shows how you can test the row-level security using sample data. |
To compile and use the Security Provider sample
- With the sample open in Visual Studio, from the Build menu, select Build Solution.
- In Windows Explorer, open the following folder, and copy the ActiveTunes.SecurityProvider.dll assembly.
C:\ActiveReports 9 Server\SDK\ActiveTunes.SecurityProvider\ActiveTunes.SecurityProvider\bin\Debug - Paste the assembly into the following folder in your ActiveReports 9 Server installation folder.
C:\ActiveReports 9 Server\SecurityProviders - On the Administrator Dashboard, in the Configuration section, click Security Provider.
- From the Custom security provider drop-down that appears, select ActiveTunesSecurityProviderFactory.
- In the ConnectionString property that appears, enter the connection string found in the ActiveTunes.SecurityProvider.UnitTests project file App.config:
ConnectionString Copy CodeData Source=C:\ActiveReports 9 Server\SDK\ActiveTunes.SecurityProvider\ActiveTunes.sqlite
- Click the Apply changes button.
Now, when you edit the ActiveTunes sample model, you can apply either the EmployeeID or CustomerID filter to any entity.
To add row-level security to the ActiveTunes sample model
- On the Administrator Dashboard, in the Administration section, click Models.
- In the list of models that appears, next to the ActiveTunes (Sample) model, click the Edit command.
- In the model editor that appears, from the Entities list to the left, click the entity that you want to filter.
- In the workspace at the center, next to the Security Filter property, click the Add command.
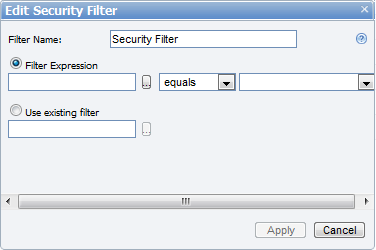
- In the Edit Security Filter dialog that appears, in the box next to Filter Name, enter a name for your filter.
- Select Filter Expression, and click the ellipsis button next to the box under that label.

- In the Select Attribute dialog that appears, select the attribute to which you want to apply the filter condition, and click OK.
- To the right of the equals option, click the drop-down arrow and select UserContext.CustomerID or UserContext.EmployeeID.
- Click Apply to add the filter to the entity.
See Also
 Show All
 Hide All