Here you can find solutions to issues that you may encounter while working with ActiveReports 9 Server. Click a description below to view the symptoms, cause, and solution.
When trying to open the Reporting Portal page, you get the Server Error "Could not connect to endpoint DesignerService.svc on the server."
Symptoms: The Reporting Portal page will not open. Instead, you get a Server Error that reads: "Could not connect to endpoint DesignerService.svc on the server. Please verify connectivity to the server and check the server configuration. HTTP request error"
Causes: The IIS Management Console is turned off by default, or WCF is not configured on your machine.
Solution 1: Turn on the IIS Management Console.
- Open Control Panel and select Programs and Features.
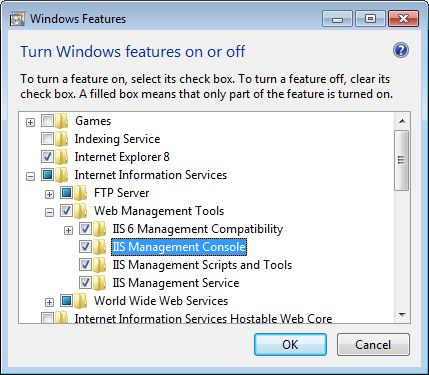
- On the left, select Turn Windows features on or off.
- In the Windows Features window that appears, expand the Internet Information Services node, then the Web Management Tools node.
- Ensure that the check box next to the IIS Management Console is selected and click OK.

Solution 2: Configure WCF on your machine.
- From the Start menu, open a command prompt (cmd.exe).
- In the command window, enter cd %SystemRoot%\Microsoft.Net\Framework\v3.0\Windows Communication Foundation\ to change to the directory where the ServiceModel Registration Tool is installed.
- For Framework 4 or 4.5, enter the command: ServiceModelReg.exe -ia to run the tool to install all WCF and WF components. (For Framework 3 or 3.5, the command is: ServiceModelReg.exe -ir.)
Solution 3: Add features to WCF Services on the server.
- From the Start menu, select Server Manager.
- On the Manage menu, select Add Roles and Features.
- In the Add Roles and Features window, select the Features tab.
- Under Features, expand the .NET Framework 4.5 (Installed) node, then the WCF Services (Installed) node.
- Under WCF Services (Installed), select the following three features:
- HTTP Activation
- Named Pipe Activation
- TCP Activation
- Click the Install button.
When trying to open the Administrator Dashboard or Report Portal page, you get HTTP Error 503 Service Unavailable.
Symptoms: The Administrator Dashboard and Report Portal pages will not open. Instead, you get HTTP Error 503.
Cause: The application pool for the service is stopped.
Solution: Restart the application pool.
- Open IIS and expand your localhost node.
- Select Application Pools.
- In the Application Pools page that appears, find ASP.NET v4.0 AR_AppPool and check its Status.
- If the Status is Stopped, right-click ASP.NET v4.0 AR_AppPool and select Start.
When trying to reinstall, you get the error: "Service 'ActiveReports 9 Server' failed to start. Verify that you have sufficient privileges to start system services."
Symptoms: The service will not start when you try to reinstall. Instead, you get "Service 'ActiveReports 9 Server' failed to start."
Cause: The previous version did not uninstall completely.
Solution: Uninstall the remnants of the previous version before reinstalling.
- In Windows Explorer, delete the directory C:\ActiveReports 9 Server.
- Open IIS, expand the localhost, then the Sites node, and delete the ActiveReports 9 Server site.
- Right-click the installer and select Run as administrator and follow the installation instructions.
The reports list is not displayed on the sample web page
Symptoms: The report list is not displayed on the sample web page.
Cause: When deploying samples, two access options in the Internet Information Services (IIS) settings are selected: "Enable anonymous access" and "Integrated Windows authentication."
Solution: Change the IIS settings to use only a single authentication scheme, "Enable anonymous access."
- In the Control Panel, open Administrative Tools, then Internet Information Services Manager.
- In the Internet Information Services window that appears, expand the tree view in the left pane until you see the Web sites/sample node.
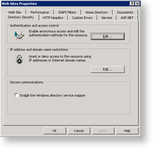
- Right-click Web Sites/sample to open the Web Sites Properties dialog.
- On the Directory Security tab, in the Authentication and access control section, click Edit.

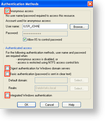
- In the Authentication Methods dialog that appears, ensure that only one authentication scheme is selected in the corresponding checkbox.

- Click OK to apply the changes, and OK again to close the dialog.
- Back in Visual Studio, run the sample again.
 Show All
 Hide All