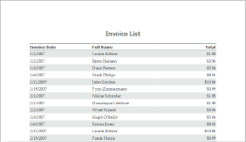
A tabular report is the simplest report that you can create with ActiveReports 9 Server.
 |
To create a table report
- Open the Report Portal and log in, and on the File tab that appears, click New to create a new report.
- In the data model list that appears, click ActiveTunes (Sample) to create a report based on the sample data.
- From the Entity Tree to the left of the report design surface, drag the Invoice entity and drop it onto the report.

Note: Drop the entity into the body of the report. If you try to drop the entity into the header area or the margins, a red X icon appears and the action is ignored. - In the Select a Table box that appears, click Table. A table is created with three columns and header labels.
- If they are not already in view, click the table to reveal the adorners.
- To adjust the position of the table within the page, click the thumb at the top left corner and drag the table.
- To align header labels with data, click the detail row under the Invoice Date label, and in the Design tab Text & Color section, click the Text Align Left button.
- Click the header row Total label, and then in the toolbar, click the Text Align Right button.
- To add a title to the report, above the toolbar, select the Report tab, then click the Textbox control and drag it into the header section of the report.
- After resizing and positioning it, click inside the textbox and type Invoice List.
- To format the text in the textbox, select the Design tab and use the tools in the Font and Text & Color sections.
- Click Preview to view the completed report.
See Also