By default, a textbox is placed with its top left corner in the spot on the report surface where you drop it, or if you double-click to add a textbox, it is placed at the top left corner of the report design surface. You can resize, move, or delete the textbox after it is placed on the report.
 |
Note: The textbox grows vertically, so any text that appears cut off in the textbox at design time does show up in the preview and in any exports or rendering. |
To resize a textbox
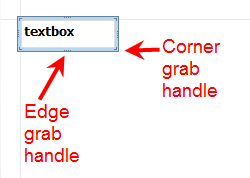
- Click the textbox to reveal the selection box with grab handles.

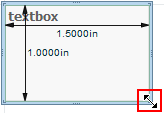
- Click and drag any corner grab handle of the textbox to change both the height and the width of the textbox. Arrows appear along with labels indicating the new height and width as you drag the grab handle.

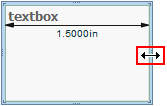
- Click and drag the edge grab handle at the center of the left or right edge of the textbox to change only the width of the textbox. A horizontal arrow appears along with a label indicating the new width as you drag the grab handle.

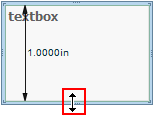
- Click and drag the edge grab handle at the center of the top or bottom edge of the textbox to change only the height of the textbox. A vertical arrow appears along with a label indicating the new height as you drag the grab handle.

To move a textbox
- Click the textbox to reveal the selection box.

- Mouse over a flat edge of the selection box that does not contain any grab handles. The four-way arrow pointer appears.

- Click and drag the selection box with the four-way arrow to move the textbox and drop it onto a new location on the report design surface.
To delete a textbox
- Click the textbox to reveal the selection box.

- On your keyboard, press the Delete key. The textbox is removed.
See Also
 Show All
 Hide All