You can control the initial rotation of the cube by setting the RotationX, RotationY, and RotationZ properties. See Cube Rotation for more information. By default only the front face of the cube is visible., but you can customize this by setting the rotation property at design time, in XAML, and in code.
At Design Time in Blend
To set the cube's initial rotation at design time, complete the following steps:
1. Click the C1Cube control once to select it.
2. Navigate to the Properties window and set the RotationX, RotationY, and RotationZ properties to 20.
In XAML
For example, to set the cube's initial rotation, add RotationX="20" RotationY="20" RotationZ="20" to the <c1ext:C1Cube> tag so that it appears similar to the following:
<c1ext:C1Cube x:Name="C1Cube1" Height="300" Width="300" RotationX="20" RotationY="20" RotationZ="20">
In Code
For example, to set the cube's initial rotation, add the following code to your project in the page's constructor:
Me.C1Cube1.RotationX = "20"
Me.C1Cube1.RotationY = "20"
Me.C1Cube1.RotationZ = "20"
•C#
this.C1cube1.RotationX = "20";
this.C1cube1.RotationY = "20";
this.C1cube1.RotationZ = "20";
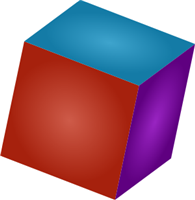
What You've Accomplished
You've changed the initial rotation of the cube. Run the application and observe that the cube appears at an angle and three faces are visible: