 What You've
Accomplished
What You've
AccomplishedIn this step, you will add a ChartView object so you can customize the X-Axis.
To format the axes for Chart for Silverligh programmatically in the code behind file
Add the following code in the Public MainPage() class to format the chart axes:
' set axes titles
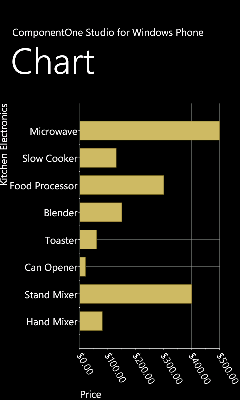
C1Chart1.View.AxisY.Title = New TextBlock(New Run("Kitchen Electronics"))
C1Chart1.View.AxisX.Title = New TextBlock(New Run("Price"))
' set axes bounds
C1Chart1.View.AxisX.Min = 0
C1Chart1.View.AxisX.Max = 500
C1Chart1.View.AxisX.MajorUnit = 20
' Financial formatting
C1Chart1.View.AxisX.AnnoFormat = "c"
' axis annotation rotation
C1Chart1.View.AxisX.AnnoAngle = "60"
•C#
// set axes titles
C1Chart1.View.AxisY.Title= new TextBlock() { Text = "Kitchen Electronics" };
C1Chart1.View.AxisX.Title = new TextBlock() { Text = "Price" };
// set axes bounds
C1Chart1.View.AxisX.Min = 0;
C1Chart1.View.AxisX.Max = 500;
C1Chart1.View.AxisX.MajorUnit = 20;
// financial formatting
C1Chart1.View.AxisX.AnnoFormat = "c";
// axis annotation rotation
C1Chart1.View.AxisX.AnnoAngle=60;
What You've
Accomplished
You have successfully formatted the Chart Axes so when you run your application the new format for the axis annotation is applied to the chart.
Congratulations! You've completed the Chart for Windows Phone quick start and created a chart application, added data to the chart, set the axes bounds, formatted the axes annotation, and customized the appearance of the chart.