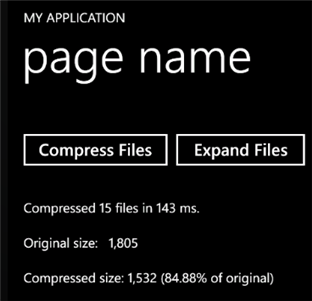
This tutorial shows how you can compress and expand individual files. Note that these are not zip files; they are just compressed streams on disk. Here is what the final application will look like:
Step 1: Create the MainPage.
Start a new Windows Phone project in Visual Studio and from the Toolbox, add the following controls to the Main page:
•Two Button controls. In the Properties window make the following changes:
|
Button |
Button.Content Property |
Button.Name Property |
|
1 |
Compress Files |
btnCompress |
|
2 |
Expand Files |
btnExpand |
•A TextBlock control below the buttons. This control will display statistics about the compression/expanding process.
Step 2: Add a reference to the C1.Phone.Zip assembly.
Go to the Solution Explorer window and click the Show All Files button. Right-click on References, and select the Add Reference menu option. Select the C1.Phone.Zip assembly from the list, or browse to find the C1.Phone.Zip.dll file.
Select the MainPage.cs or go to View|Code to open the Code Editor. At the top of the file, add the following statements:
•C#
using System.IO;
using C1.C1Zip;
This makes the objects defined in the C1.Phone.Zip and System.IO assemblies visible to the project and saves a lot of typing.
Step 3: Define the directory names for the compressed and expanded files.
In the Code Editor of the form, define the following constants:
•C#
private FileStream srcStream = null;
private const string DIR_FILES = @"\files";
private const string DIR_FILE = @"\file";
private const string DIR_COMP = @"\compressed";
private const string DIR_EXP = @"\expanded";
private string content = "This is a just test file for compressing files sample " +
"which is located in the isolated storage in wp7. It's named file{0}";
These are the directory names where the compressed and expanded files will be stored (relative to the directory where the tutorial application is located on your disk).
Step 4: Add code to compress files.
Add the following code to create the source files:
•C#
// Constructor
public MainPage()
{
InitializeComponent();
this.btnExpand.IsEnabled = false;
this.CreateFiles();
}
private void CreateFiles()
{
IsolatedStorageFile isf = IsolatedStorageFile.GetUserStoreForApplication();
isf.CreateDirectory(DIR_FILES);
for (int idx = 0; idx < 15; idx++)
{
var stream = isf.CreateFile(DIR_FILES + DIR_FILE + idx + ".txt");
StreamWriter sw = new StreamWriter(stream);
sw.Write(string.Format(content, idx));
sw.Close();
}
}
Step 5: Add code to compress the file.
Add the following code to handle the Click event for the Compress File command button:
•C#
private void btnCompress_Click(object sender, RoutedEventArgs e)
{
// Create compress directory.
IsolatedStorageFile isf = IsolatedStorageFile.GetUserStoreForApplication();
if (!isf.DirectoryExists(DIR_COMP))
{
isf.CreateDirectory(DIR_COMP);
}
// Prepare to collect compression statistics.
long count = 0;
long size = 0;
long sizeCompressed = 0;
long ticks = DateTime.Now.Ticks;
// Compress all files in the application dir into the compressed dir.
foreach (string srcFile in isf.GetFileNames(DIR_FILES + "\\*.txt"))
{
string dstFile = DIR_COMP + "\\" + srcFile + ".cmp";
dstFile = dstFile.Replace(".txt", "");
var srcStream = isf.OpenFile(DIR_FILES + "\\" + srcFile, FileMode.Open);
var dstStream = isf.CreateFile(dstFile);
// Compress file.
CompressFile(dstStream, srcStream);
// Update stats.
count++;
size += srcStream.Length;
sizeCompressed += dstStream.Length;
// Always close our streams.
if (srcStream != null) srcStream.Close();
if (dstStream != null) dstStream.Close();
}
// Show stats.
string msg = string.Format("Compressed {0} files in {1} ms.\n\r" + "Original size: {2:#,###}\n\r" + "Compressed size: {3:#,###} ({4:0.00}% of original)", count, (DateTime.Now.Ticks - ticks) / TimeSpan.TicksPerMillisecond, size, sizeCompressed, ((double)sizeCompressed / size) * 100.0);
this.textBlock1.Text = msg;
// Now we can expand.
btnExpand.IsEnabled = true;
}
Add the following code for the CompressFile function:
•C#
private bool CompressFile(Stream dstStream, FileStream srcStream)
{
// Prepare to compress file.
bool retval = true;
try
{
// Open a compressor stream on the destination file.
C1ZStreamWriter sw = new C1ZStreamWriter(dstStream);
// Copy the source into the compressor stream.
StreamCopy(sw, srcStream);
}
catch
{
// Exception? Tell the caller we failed.
retval = false;
}
// Done.
return false;
}
The function starts by creating two new file streams: one for the source file and one for the compressed file. Then it creates a C1ZStreamWriter object and attaches it to the destination stream. Next, it calls the StreamCopy function to transfer data from the source file and write it into the compressor stream.
Finally, the function closes both streams. Note the use of the Finally statement to ensure that both streams are properly closed even if there are exceptions while the function is executing.
The StreamCopy function simply copies bytes from one stream to another. Here's the code:
•C#
private void StreamCopy(Stream dstStream, Stream srcStream)
{
byte[] buffer= new byte[32768];
for (;;)
{
int read = srcStream.Read(buffer, 0, buffer.Length);
if (read == 0) break;
dstStream.Write(buffer, 0, read);
}
dstStream.Flush();
}
Note that the function calls the Flush method after it is done to ensure that any cached data is written out when the function is done copying. This is especially important when dealing with compressed streams, since they cache substantial amounts of data in order to achieve good compression rates.
Step 6: Add code to open the compressed file.
Add the following code to handle the Click event for the Expand Files command button:
•C#
private void btnExpand_Click(object sender, RoutedEventArgs e)
{
// Create a directory for expanded files.
IsolatedStorageFile isf = IsolatedStorageFile.GetUserStoreForApplication();
if (!isf.DirectoryExists(DIR_EXP))
{
isf.CreateDirectory(DIR_EXP);
}
// Prepare to collect compression statistics.
long count = 0;
long size = 0;
long sizeExpanded = 0;
long ticks = DateTime.Now.Ticks;
// Expand all files in the "compressed" dir to the "expanded" dir.
foreach (string srcFile in isf.GetFileNames(DIR_COMP + "\\*.cmp"))
{
// Expand file.
string dstFile = DIR_EXP + "\\" + srcFile;
dstFile = dstFile.Replace(".cmp", "");
var srcStream = isf.OpenFile(DIR_COMP + "\\" + srcFile, FileMode.Open);
var dstStream = isf.CreateFile(dstFile);
ExpandFile(dstStream, srcStream);
// Update stats.
count++;
size += srcStream.Length;
sizeExpanded += dstStream.Length;
// Always close our streams.
if (srcStream != null) srcStream.Close();
if (dstStream != null) dstStream.Close();
}
// Show stats.
string msg = string.Format("Expanded {0} files in {1} ms.\n\r" + "Original size: {2:#,###}\n\r" + "Expanded size: {3:#,###} ({4:0.00} x size of compressed)", count, (DateTime.Now.Ticks - ticks) / TimeSpan.TicksPerMillisecond, size, sizeExpanded, sizeExpanded / size);
textBlock1.Text = msg;
}
Here's the code for the ExpandFile function:
•C#
private bool ExpandFile(Stream dstStream, Stream srcStream)
{
// Prepare to expand file.
bool retval = true;
try
{
// Open an expander stream on the compressed source.
C1ZStreamReader sr = new C1ZStreamReader(srcStream);
// Copy the expander stream into the destination file.
StreamCopy(dstStream, sr);
}
catch
{
// Exception? Tell the caller we failed.
retval = false;
}
// Done.
return retval;
}
The function is similar to CompressFile, except it attaches a C1ZStreamReader to the source stream instead of attaching a C1ZStreamWriter to the destination stream.
This concludes the Compressing Files tutorial.