To bind the controls to a data source, complete the following steps:
1. Select the DataList control and use the Properties window to set the DataSourceID property to point to the AccessDataSource1. Click No to the dialog box that appears for resetting the template.
This will cause the DataList control to bind to the table that contains the product information and to create one item on the page for each item in the database.
Switch back to template editing mode. To bind the controls
on the template to specific fields in the database click the smart tag (![]() ) above the
DataList control and select Edit Templates from the Data List
Tasks menu.
) above the
DataList control and select Edit Templates from the Data List
Tasks menu.
2. Then select the
first Label control and click the smart tag (![]() ) above the Label control and
select Edit DataBindings.
) above the Label control and
select Edit DataBindings.
The DataBindings dialog box appears, which allows you to bind one or more control properties to data fields.
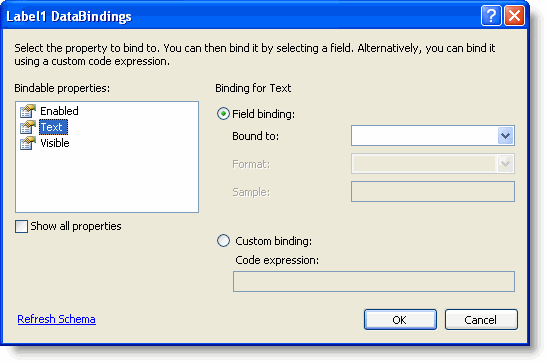
3. Bind the Text property on the Label1 control to the ProductName field in the Container object, which in this case is the DataList control.
Be careful not to bind the item directly to the database, or the list will always display the same item. The Container object takes care of enumerating all the records in the data source and making the current item available to the controls in the template.
4. Click OK to bind the label and close the Label1 DataBindings dialog box
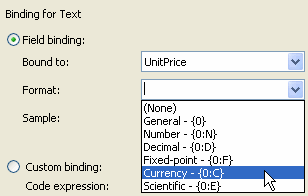
5. Repeat this procedure to bind the Label2 control to the QuantityPerUnit field and the Label3 control to the UnitPrice field (since there isn't a product description field handy in the NorthWind Products table).
Note when binding the Label3 control, you can set the format to Currency in the DataBindings dialog box:
Note: To add a custom business name, business logo or button type, select the C1AddToCart control and set the Business, BusinessLogo, and ButtonType properties in the Properties window. These will be the same for every item on the table.
6. Then click the smart
tag (![]() ) above the
C1AddToCart control, and select Edit DataBindings from the
C1AddToCart Tasks menu. The C1AddToCart1 DataBindings
dialog box appears.
) above the
C1AddToCart control, and select Edit DataBindings from the
C1AddToCart Tasks menu. The C1AddToCart1 DataBindings
dialog box appears.
7. This time, bind the ItemName, ItemNumber,and ItemPrice properties to the ProductName, ProductID, and UnitPrice database fields, respectively. This will set up the button correctly for each item in the data table.
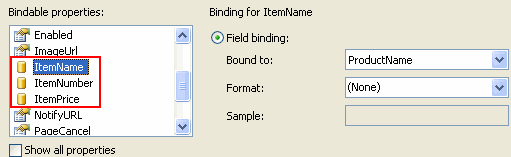
Notice the icon that appears next to the property name for the data-bound properties. After you close the dialog box, the icon also appears next to the property name in the Properties window. This is a helpful feature while you are setting up the form.
8. Click OK to save your bindings and close the C1AddToCart1 DataBindings dialog box.
|