 ) to open the C1MultiView
Tasks menu and select MultiView Designer.
) to open the C1MultiView
Tasks menu and select MultiView Designer. You can add arbitrary controls to each of your C1MultiView's pages in Design view, Source view, or in code. In this topic, you will create a C1MultiView control with two page views and then add one arbitrary control to each page. This topic assumes that you have created an AJAX-enabled ASP.NET project that contains a ScriptManager control (see Creating an AJAX-Enabled ASP.NET Project) and a C1MultiView control.
In Design View
Complete the following steps:
1.
Click C1MultiView's
smart tag () to open the C1MultiView
Tasks menu and select MultiView Designer.
The C1MultiView Designer Form appears.
2.
Use the Add Child Item button  to add two pages to your C1MultiView.
3. Click OK to close the C1MultiView Designer Form.
4. Select a Button control from the Visual Studio Toolbox and drag it onto your C1MultiView control.
5.
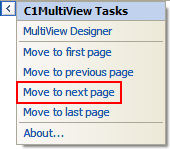
Click C1MultiView's
smart tag () and select Move to next
page to bring the second page into focus.
6. Select a TextBox from the Toolbox window and drag it onto your form.
7. Save the project and open it in a Studio for iPhone-compatible browser.
In Source View
Complete the following steps:
1.
Click C1MultiView's smart tag ()
to open the C1MultiView Tasks menu and then select MultiView
Designer.
The C1MultiView Designer Form appears.
2.
Use the Add Child Item button to add two pages to your
C1MultiView.
3. Click OK to close the C1MultiView Designer Form.
4. Click the Source tab to enter Source view.
5. Locate the <cc1:C1View> tag for View01 and place the following tag between them:
<asp:Button ID="Button1" runat="server" Text="Hello World!" />
6. Locate the <cc1:View> tag for View02 and place the following tag between them:
<asp:TextBox ID="TextBox2" runat="server" />
7. Save the project and open it in a Studio for iPhone-compatible browser.
In Code
Complete the following steps:
1.
Click C1MultiView's smart tag ()
to open the C1MultiView Tasks menu and then select MultiView
Designer.
The C1MultiView Designer Form appears.
2.
Use the Add Child Item button to add two pages to your
C1MultiView.
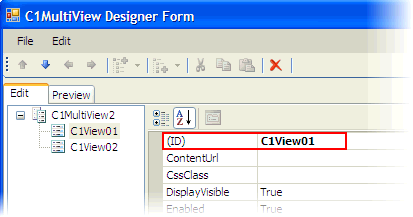
3. In treeview, select C1View01 to reveal its list of properties; set the ID property to "C1View01".
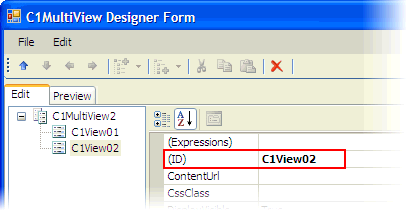
4. In treeview, select C1View01 to reveal its list of properties; set the ID property to "C1View02".
5. Click OK to close the C1MultiView Designer Form.
6. In the Solution Explorer window, right-click the project and select View Code to enter the code editor.
7. Create a Button control and add text to it by entering the following code to the Page_Load event:
Dim nuButton As Button = New Button()
nuButton.Text = "Hello World!"
•C#
Button nuButton = new Button();
nuButton.Text = "Hello World!";
8. Create a TextBox control:
Dim nuTextBox As TextBox = New TextBox()
•C#
TextBox nuTextBox = new TextBox();
9. Add the Button control to the first tab page:
C1View01.Controls.Add(nuButton)
•C#
C1View01.Controls.Add(nuButton);
10. Add the TextBox control to the second tab page:
C1View02.Controls.Add(nuTextBox)
•C#
C1View02.Controls.Add(nuTextBox);
11. Save the project and open it in a Studio for iPhone-compatible browser.
 This Topic Illustrates the
Following:
This Topic Illustrates the
Following:
After you build the project, observe that a Button control appears on the first page, whereas a TextBox control appears on the second page.