In this topic, you will add C1SegmentedButtons to C1ViewPort's toolbar in Design view and in Source view.
In Design View
Complete the following steps:
1. In the Toolbox, double-click the ScriptManager icon to add the control to your page.
2. In the Toolbox, double-click the C1ViewPort icon to add the control to your page.
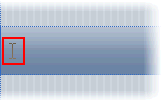
3. Click C1ViewPort's toolbar.
Your cursor appears in C1ViewPort's toolbar.
4. In the Toolbox, double-click the C1SegmentedButtons icon to add the control to your page.
In Source View
Complete the following steps:
1. Click the Source tab to enter Source view.
2. Place your cursor before the </form> tag, navigate to the Toolbox, and double-click the ScriptManager icon.
3. A ScriptManager control is added to the project.
4. Place your cursor between the <div> and </div> tags, navigate to the Toolbox, and double-click C1ViewPort to add the control to your page.
5. Enter the following markup between the <cc1:C1ViewPort> and </cc1:C1ViewPort> tags:
<Toolbar></Toolbar>
6. Place your cursor between the <Toolbar> and </Toolbar> tags.
7. In the Toolbox, double-click C1SegmentedButtons to add the control to your project.
C1SegmentedButtons is added to C1ViewPort's toolbar. The markup will resemble the following:
<cc1:C1ViewPort ID="C1ViewPort1" runat="server">
<ToolBar>
<cc2:C1SegmentedButton ID="C1SegmentedButton1" runat="server">
</cc2:C1SegmentedButton>
</ToolBar>
</cc1:C1ViewPort>