) to open the C1PickerView
Tasks menu and then select C1PickerView Designer.
) to open the C1PickerView
Tasks menu and then select C1PickerView Designer.A picker can contain two types of list: a numbered list and an itemized list. In this topic, you will learn how to add a picker with an itemized list to the C1PickerView control. To learn how to create a picker with a numbered list, see Creating a Picker List with a Numbered Range.
In Design View
Complete the following steps:
1. Add a C1PickerView control and a ScriptManager control to your ASP.NET Ajax-Enabled Web project.
2.
Click C1PickerView's
smart tag () to open the C1PickerView
Tasks menu and then select C1PickerView Designer.
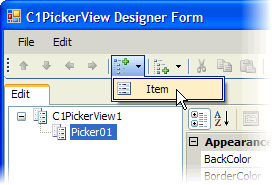
The C1PickerView Designer Form opens.
3. Click the Add Child Item drop-down arrow and select Picker to add it to the control.

4. In treeview, select C1PickerView1 to reveal its properties.
5. With C1Picker1 selected in treeview, click the Add Child Item drop-down arrow and select Item.
6.
Click the Add Child Item button  twice to add two more items to the
control.
twice to add two more items to the
control.
7. Right-click Item01 to open its context menu, select Rename, and type "Cat". Repeat this for Item02 and Item03, but name them as follows:
•Item02 – "Bat"
•Item03 – "Rat"
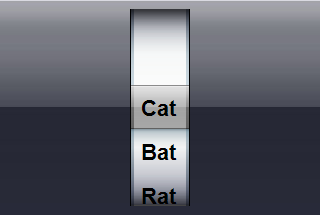
8. Click OK to close the C1PickerView Designer Form and observe that you have created a picker with an itemized list.
In Source View
Complete the following steps:
1. Click the Split tab to enter Split view.
2. Add a C1PickerView control and a ScriptManager control to your ASP.NET Ajax-Enabled Web project.
3. In the Source view pane, enter the following markup between the <cc1:C1PickerView> and </cc1:C1PickerView> tags:
<Pickers>
<cc1:C1Picker runat="server">
</cc1:C1Picker>
</Pickers>
The above markup created the picker but didn't specify a list type. If you were to synchronize Source view and Design view at this point, the C1PickerView control would exhibit a blank picker such as the one in the following image:

4. Set the list type to an itemized list by adding PickerType="NumberRange" to the <cc1:C1Picker> tag so that the markup resembles the following:
<cc1:C1Picker runat="server" PickerType="Depends on Items">
5. Enter the following markup between the <cc1:C1Picker> and </cc1:C1Picker> tags:
<Items>
<cc1:C1PickerItem runat="server" Value="Cat" Text="Cat"/>
<cc1:C1PickerItem runat="server" Value="Bat" Text="Bat"/>
<cc1:C1PickerItem runat="server" Value="Rat" Text="Rat"/>
</Items>
6. Synchronize Design view with Source view and observe that the picker now holds an itemized list.
 This Topic
Illustrates the Following:
This Topic
Illustrates the Following:
In this topic, you created an itemized list with three items. The result of this topic will resemble the following image: