Creating a page header with three parts demonstrates how to create a header that is divided into three columns. The following key points are shown in this topic:
• Creating a table with one row and three columns in C1PrintDocument
A table can easily be created in C1PrintDocument by using the RenderTable class and its associated properties: Body, Rows, and Columns.
• Creating page settings for C1PrintDocument
An instance of the System.Drawing.Printing.PageSettings class can be specified for the C1PrintDocument so that the page settings of the document can be set up.
• Clearing borders in a table
We can set the AllEmpty property to True if we want to clear all of the borders in a table. If the AllEmpty property is set to False, it makes all four borders black and .5 points thick (this is the default line for borders).
• Clearing the vertical lines of the border
We can set the Empty property of a border to True. If the Empty property is set to False, it makes the line width set to .5 points thick. If you want to clear the vertical lines inside a table you will assign the Empty property to the BorderTableVert property. The BorderTableVert property determines the vertical lines drawn inside a table.
• Setting up the text alignment in each section of the page header
The TextAlignHorz property of the C1DocStyle class is used to specify the horizontal alignment of the text. You can assign a member (left, right, justify or center) of the AlignHorzEnum to the TextAlignHorz property.
The following detailed steps demonstrate how to create a header with three parts:
1. Create a new Windows Forms application. Drag and drop a C1PrintPreview control onto your form. Drag and drop a C1PrintDocument component onto your form – it will appear in the components' tray below the form. The preview will have the default name c1PrintPreview1, the document c1PrintDocument1. Set the value of the Document property of c1PrintPreview1 control to c1PrintDocument1, so that the preview will show the document when the application runs. Double click on the form to create a handler for the Form_Load event – this is where all code shown below will be written.
2. In the Form_Load event, we will set up our document. Specify the page margins (page margins are specified in 1/100 of an inch units). Create a RenderTable for the page header, add one row to its body, and 3 columns for the left, middle and right parts of the header. Set the WidthStr of each column to "33%" (note that this will be calculated at the time of setting, based on the current page width):
Me.C1PrintDocument1.StartDoc()
Me.C1PrintDocument1.PageSettings.Margins.Top = 50
Me.C1PrintDocument1.PageSettings.Margins.Bottom = 25
Me.C1PrintDocument1.PageSettings.Margins.Left = 50
Me.C1PrintDocument1.PageSettings.Margins.Right = 50
Dim theader As New C1.C1PrintDocument.RenderTable(Me.C1PrintDocument1)
' Make a table for the page header.
theader.Body.Rows.AddSome(1)
' Add three columns to the table.
theader.Columns.AddSome(3)
theader.Columns(0).WidthStr = "33%"
theader.Columns(1).WidthStr = "33%"
theader.Columns(2).WidthStr = "33%"
• C#
this.c1PrintDocument1.StartDoc();
this.c1PrintDocument1.PageSettings.Margins.Top = 50;
this.c1PrintDocument1.PageSettings.Margins.Bottom = 25;
this.c1PrintDocument1.PageSettings.Margins.Left = 50;
this.c1PrintDocument1.PageSettings.Margins.Right = 50;
C1.C1PrintDocument.RenderTable theader = new C1.C1PrintDocument.RenderTable(this.c1PrintDocument1);
// Make a table for the page header.
theader.Body.Rows.AddSome(1);
// Add three columns to the table.
theader.Columns.AddSome(3);
theader.Columns[0].WidthStr = "33%";
theader.Columns[1].WidthStr = "33%";
theader.Columns[2].WidthStr = "33%";
3. Because we will use the table as a layout tool, we need to remove the default table borders. To achieve that, we need to do two things: set the AllEmpty property of the table style's Borders to True (which will clear borders around the whole table), and clear the StyleTableCell's BorderTableVert (which will clear borders between columns):
' Clear borders.
theader.Style.Borders.AllEmpty = True
theader.StyleTableCell.BorderTableVert.Empty = True
• C#
// Clear borders.
theader.Style.Borders.AllEmpty = true;
theader.StyleTableCell.BorderTableVert.Empty = true;
4. We will use the TextAlignHorz property to set the alignment of the text in each column of the page header. We will also assign a new font style for the text in our page header. Note that in this example the font type will be Arial and it will be 14 points in size.
' Set up alignment for the parts of the header.
theader.Body.Cell(0, 0).RenderText.Style.TextAlignHorz = C1.C1PrintDocument.AlignHorzEnum.Left
theader.Body.Cell(0, 1).RenderText.Style.TextAlignHorz = C1.C1PrintDocument.AlignHorzEnum.Center
theader.Body.Cell(0, 2).RenderText.Style.TextAlignHorz = C1.C1PrintDocument.AlignHorzEnum.Right
theader.StyleTableCell.Font = New Font("Arial", 14)
• C#
// Set up alignment for the columns of the header.
theader.Body.Cell(0, 0).RenderText.Style.TextAlignHorz = C1.C1PrintDocument.AlignHorzEnum.Left;
theader.Body.Cell(0, 1).RenderText.Style.TextAlignHorz = C1.C1PrintDocument.AlignHorzEnum.Center;
theader.Body.Cell(0, 2).RenderText.Style.TextAlignHorz = C1.C1PrintDocument.AlignHorzEnum.Right;
theader.StyleTableCell.Font = new Font("Arial", 14);
5. We will draw the text into each column of the table for the page header. Set the RenderObject property of the document's PageHeader to theader. Finish generating the document by calling the EndDoc method.
theader.Body.Cell(0, 0).RenderText.Text = "Left part"
theader.Body.Cell(0, 1).RenderText.Text = "Center part"
theader.Body.Cell(0, 2).RenderText.Text = "Right part"
Me.C1PrintDocument1.RenderBlock(theader)
Me.C1PrintDocument1.EndDoc()
• C#
theader.Body.Cell(0, 0).RenderText.Text = "Left part";
theader.Body.Cell(0, 1).RenderText.Text = "Center part";
theader.Body.Cell(0, 2).RenderText.Text = "Right part";
this.c1PrintDocument1.RenderBlock(theader);
this.c1PrintDocument1.EndDoc();
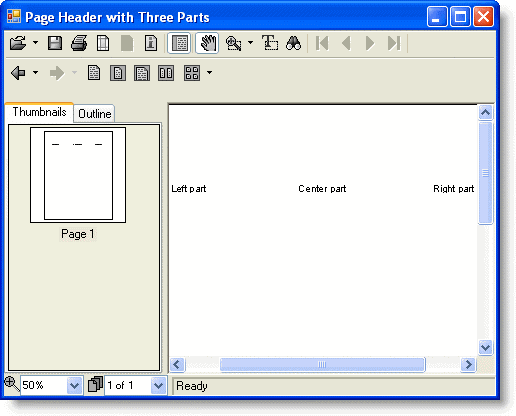
Run the program and observe the following:
Your new page header with three parts will appear like this at run time:
|