Subreports are regular reports contained in a field in another report (the main report). Subreports are usually designed to display detail information based on a current value in the main report, in a master-detail scenario.
In the following example, the main report contains categories and the subreport in the Detail section contains product details for the current category:
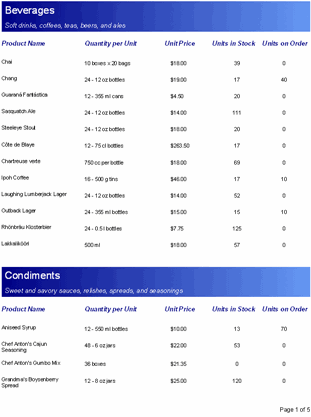
To create a master-detail report based on the Categories and Products tables, you need to create a Categories report (master view) and a Products report (details view).
Step 1: Create the master report
1. Create a basic report definition using the C1Report Wizard.
a. Select the Categories table from the Northwind database (Nwind.mdb located in the ComponentOne Samples\Common folder).
b. Include the CategoryName and Description fields in the report.
2. In the C1ReportDesigner application, click the Close Print Preview button to begin editing the report.
3. Set the Page Header and Header section's Visible property to False.
4. In the Detail section, select the DescriptionCtl and move it directly below the CategoryNameCtl.
5. Use the Properties window to change the Appearance settings (Font and ForeColor). Note that for this example, a Gradient field was added to the Detail Section. For information on Gradient fields, see Adding Gradient Fields.
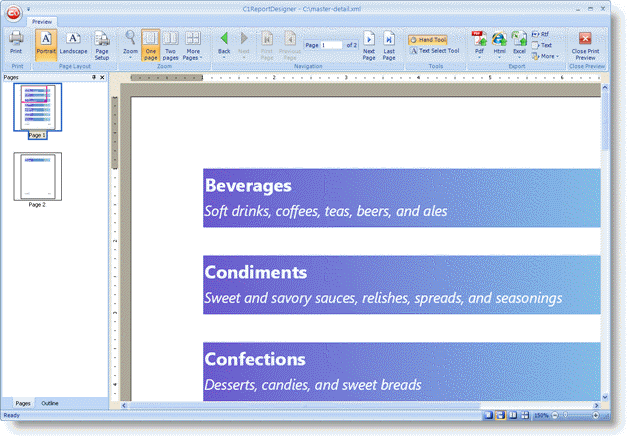
6. Select the Preview button, the Categories report should now look similar to the following image:
Step 2: Create the detail report
1. In the C1ReportDesigner application, click the New Report button to create a basic report definition using the C1Report Wizard.
a. Select the Products table from the Northwind database.
b. Include the following fields in the report: ProductName, QuantityPerUnit, UnitPrice, UnitsInStock, and UnitsOnOrder.
2. In the Report Designer, click the Close Print Preview button to begin editing the report.
a. Set the Page Header and Header section's Visible property to False.
b. In the Detail section, arrange the controls so that they are aligned with the heading labels. Use the Properties window to change the Appearance settings.
Step 3: Create the subreport field
The C1ReportDesigner application now has two separate reports, Categories Report and Products Report. The next step is to create a subreport:
1. From the Reports list in the Designer, select Categories Report (master report).
2. In design mode, from the click the Add Subreport button in the Fields group of the Design tab and select Products Report from the drop-down menu.

3. In the Detail section of your report, click and drag the mouse pointer to make the field for the subreport:

Step 4: Link the subreport to the master report
The master-detail relationship is controlled by the Text property of the subreport field. This property should contain an expression that evaluates into a filter condition that can be applied to the subreport data source.
The Report Designer can build this expression automatically for you. Complete the following steps:
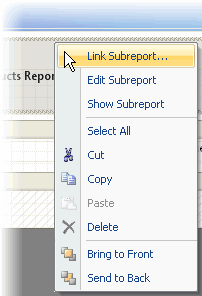
1. Right-click the subreport field and select Link Subreport from the menu.
2. A dialog box appears that allows you to select which fields should be linked.
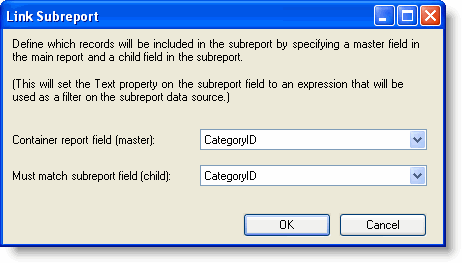
3. Once you make a selection and click OK, the Report Designer builds the link expression and assigns it to the Text property of the subreport field. In this case, the expression is:
"[CategoryID] = '" & [CategoryID] & "'"
Alternatively, you can also link the subreport to the master report by completing the following steps:
1. From the Properties window, click the Text property of the subreport field and select Script Editor from the drop-down list.
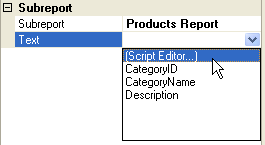
2. Enter the following expression in the VBScript Editor:
"[CategoryID] = '" & [CategoryID] & "'"
3. Click OK to close the VBScript Editor and build the expression.
|
