Adding a Calendar Screen
You can use the ComponentOne Calendar Screen template to create a fully functional schedule.
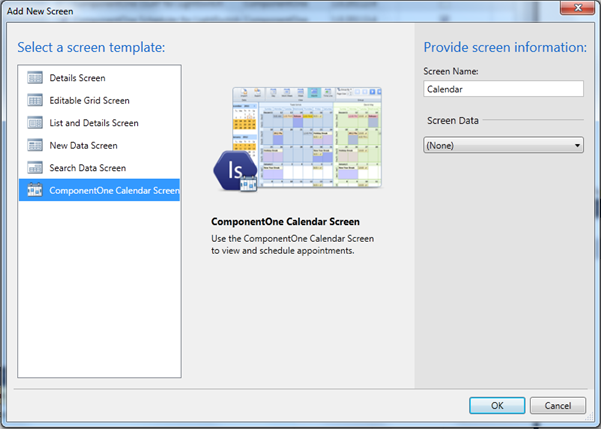
To add a ComponentOne Calendar Screen template to your project, follow these steps:
1. In the Solution Explorer, right-click the Screens folder and select Add Screen.
2. In the list of screen templates, select ComponentOne Calendar Screen.
Note: If you do not see the ComponentOne Calendar Screen option, make sure you have installed Studio for LightSwitch and included the extension in the project.
3. Under Provide screen information, enter a Screen Name and select a data source from the list under ScreenData.
4. Click OK.
Please note: Even if you activate your license during installation, the first time you run a new Scheduler application, a reminder screen will appear. To prevent that from happening, open the LightSwitch screen designer, select the C1Scheduler node, and save the screen. In the Properties window, you should see a green shield icon next to the About C1Scheduler link. This indicates that C1Scheduler is licensed. You need to do this for every Scheduler screen you create.
