Step 2: Adding Data Sources
In this step, you will create a primary appointments data source that will be bound to the calendar screen to create a fully functional schedule. You will also create two additional tables: one to keep track of the sales people, who will become the contacts list, and one to keep track of information for the sales regions, which will become the resources list. Users will be able to use these lists to add contacts and resources to appointments in the schedule.
1. In the Solution Explorer, right-click the Data Sources folder and select Add Table. Repeat this step to create three tables in all.
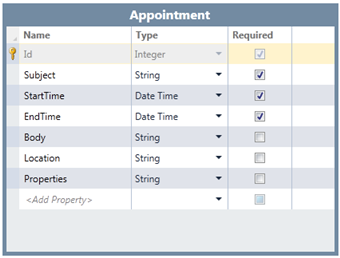
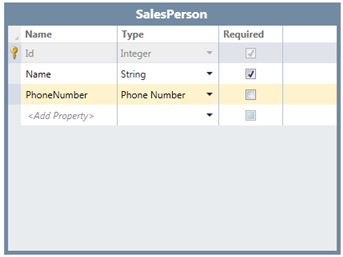
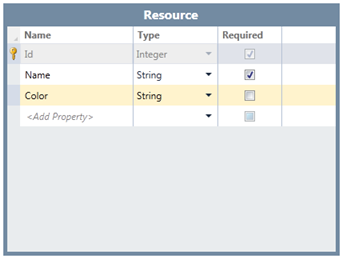
2. Set up each table as in the following examples:
3. Select the Appointment table and click the Properties row. In the Visual Studio Properties window, delete 255 for the MaximumLength property. This will allow the control to maintain relationships between appointments, contacts, and resources.
In the next step, you will add a screen template to be associated with each of the tables. This is necessary to create the UI for the schedule and lists.
