In the next set of steps we'll add content to the C1TabPages using markup code. You can easily add arbitrary controls into specific C1TabPages by adding elements to the C1TabPages through the .aspx page.
1. Switch to source view and enter the following markup for the C1TabPage2:
<cc1:C1TabPage ID="C1TabPage02" runat="server" Text="Automatic Updates" TabIndex="2"><asp:RadioButton ID="RadioButton1" runat="server" /><br />
<asp:Label ID="Label3" runat="server" Text="This is page 2"></asp:Label>
<asp:CheckBox ID="CheckBox1" runat="server" />
<asp:Calendar ID="Calendar3" runat="server" BackColor="#FFFFCC" BorderColor="#FFCC66" BorderWidth="1px" DayNameFormat="Shortest"
Font-Names="Verdana" Font-Size="8pt" ForeColor="#663399" Height="200px"
ShowGridLines="True" Width="220px">
<DayHeaderStyle BackColor="#FFCC66" Font-Bold="True" Height="1px" />
<NextPrevStyle Font-Size="9pt" ForeColor="#FFFFCC" />
<OtherMonthDayStyle ForeColor="#CC9966" />
<SelectedDayStyle BackColor="#CCCCFF" Font-Bold="True" />
<SelectorStyle BackColor="#FFCC66" />
<TitleStyle BackColor="#990000" Font-Bold="True" Font-Size="9pt" ForeColor="#FFFFCC" />
<TodayDayStyle BackColor="#FFCC66" ForeColor="White" />
</asp:Calendar>
<asp:TextBox ID="TextBox2" runat="server"></asp:TextBox>
</cc1:C1TabPage>
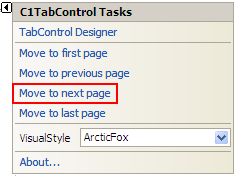
2. Switch to Design view and open the C1TabControl Tasks menu.
3. Click Move to Next Page.
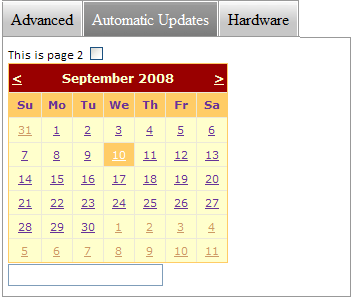
Observe the controls appear on the Automatic Updates page. Your result will resemble the following image:
|