You can add content to the tab page using the Content property. This topic demonstrates how to add content – in this case, a standard Button control – to a tab page in Design view, in XAML, and in code. This topic assumes that you have added at least one C1TabItem to the C1TabControl control.
In Design View
Complete the following steps:
1. In Design view, select the tab you wish to add the content to.
2. In the Toolbox, double-click the Button icon to add a Button control to the tab.
3. Double click the Button icon to add it to the tab page's content area.
4. Select the Button control and set the following properties in the Properties window:
•Set the Width property to "Auto".
•Set the Height property to "Auto".
5. Run the program and click the tab.
In XAML
To add a Button control to the content area in XAML, place the following markup between the <c1:C1TabItem> and </c1:C1TabItem> tags:
<Button Content="Button" Height="Auto" Width="Auto"/>
In Code
Complete the following steps:
1. Open the Window1.xaml.cs page.
2. Add the following code beneath the InitializeComponent() method:
'Create the Button control
Dim NewButton As New Button()
NewButton.Content = "Button"
'Set the Button Control's Width and Height properties
NewButton.Width = Double.NaN
NewButton.Height = Double.NaN
'Add the Button to the content area
c1TabItem1.Content = (NewButton)
•C#
//Create the Button control
Button NewButton = new Button();
NewButton.Content = "Button";
//Set the Button Control's Width and Height properties
NewButton.Width = double.NaN;
NewButton.Height = double.NaN;
//Add the Button to the content area
c1TabItem1.Content = (NewButton);
3. Run the program.
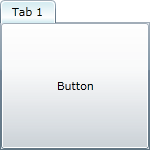
![]() This Topic Illustrates the Following:
This Topic Illustrates the Following:
The image below depicts a C1TabItem with a Button control as content.