To spell-check a project, complete the following steps:
1. Open an ASP.NET project.
2. View the HTML Source code.
3. Select Spell Check from the Tools menu.
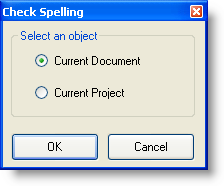
4. Choose an object from the Check Spelling dialog box to begin spell checking.
5. WebSpell IDE for ASP.NET begins spell-checking and words that are not found in the dictionary are displayed in the Not in Dictionary text box:
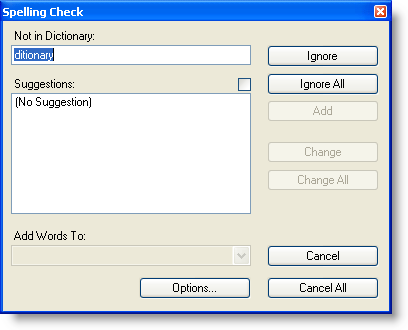
6. When a word is not found in the dictionary, select one of the following options:
Press Ignore to skip the word once.
Press Ignore All to skip all instances of the word.
Press Add to add the word to the Custom Dictionary.
Spell-checking will continue until all words not found in the dictionary have been located.
Note: A custom dictionary must be added in order to use the Add Words To dropdown box. The custom dictionary is added by selecting C1WebSpell options from the Tools menu, selecting the Dictionaries tab, and pressing Add.
7. Press Cancel to close the Spelling Check dialog box.
|