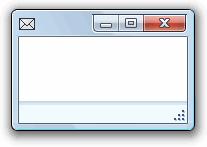
You can set an image that will appear in the upper left corner of the dialog window's caption bar. This icon image can indicate a window's contents or be used to differentiate dialog windows; this is particularly useful when the dialog window is minimized. Setting this icon image is simple using styles. In the following steps you'll set the control's theme and add a style to override the icon element in that theme.
Complete the following steps to add an icon to the caption bar:
1. Navigate to the Visual Studio Toolbox and add the C1Window control to your page.
2. Open the C1Window Tasks menu from its smart tag and select the ShowOnLoad checkbox to set the ShowOnLoad property to True:

For more information on accessing the smart tag, see C1Window Smart Tag.
3. In the C1Window Tasks menu click on the VisualStyle drop-down box and select Vista.
4. Select Website | Add Existing Item. The Add Existing Item dialog box will open.
5. Locate the image you wish to add to the caption bar and select Add to add it to the project.
Note that in this example, the following image was used:
|
Image |
Name |
Size |
|
|
mail.gif |
16 x 12 pixels |
You can add your own image, or use the one above. To use the above image, right-click the image in the table above and select Copy. Paste the image into a paint program of your choice and save it with the name and dimensions indicated above.
6. Switch to source view and add the following <style> tag between the <head> and </head> tags at the top of the page:
<style>
.C1Window_Vista .C1Heading .C1Icon
{
float:left;
height:12px;
margin-right:3px;
margin-top:20px;
width:16px;
background: transparent url('mail.gif') no-repeat;
}
</style>
Replace mail.gif in the above with the name of your image, if different. This style will override the default icon image (none) in the Vista style.
7. Run your application. The dialog window appears with an icon in the caption bar:

|
