In order to use C1Scheduler or another Scheduler for WPF control in the Design workspace of Blend, you must first add a reference to the C1.WPF.C1Schedule assembly and then add the component from Blend's Asset Library.
To add a reference to the assembly:
1. Select Project | Add Reference.
2. Browse to find the C1.WPF.C1Schedule.dll installed with Scheduler for WPF.
Note: Both the C1.WPF.C1Schedule.dll and C1.WPF.C1Schedule.Design.dll files are installed to C:\Program Files\ComponentOne\Studio for WPF\bin by default. The C1.WPF.C1Schedule.Design.dll installed with Scheduler for WPF should always be placed in the same folder as the C1.WPF.C1Schedule.dll. It should NOT be placed in the GAC. This assembly is required by Blend.
3. Select C1.WPF.C1Schedule.dll and click Open. A reference is added to your project.
To add a component from the Asset Library:
1. Once you have added a reference to the C1.WPF.C1Schedule assembly, click the Asset Library button in the Blend Toolbox. The Asset Library appears.
2. Click the Custom Controls tab. All of the Scheduler for WPF components are listed here.
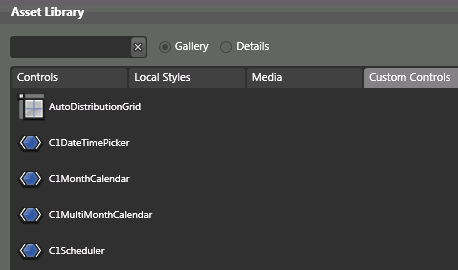
3. Select C1Scheduler. The component will appear in the Toolbox above the Asset Library button.
4. Double-click the C1Scheduler component in the Toolbox to add it to the Window1.xaml.
|