In this topic, you will learn how to create a new Foxy for ASP.NET project from an existing visual style.
Note: When you create a new Foxy for ASP.NET project, the project’s files will be automatically loaded into the default directory at C:\Documents and Settings\[User]\My Documents\C1FoxyVSD (in XP) or C:\Users\[User]\Documents\C1FoxyVSD\TutorialStyle (in Vista).
From the Welcome to Foxy for ASP.NET Menu
Complete the following steps:
1. Launch the Foxy for ASP.NET application.
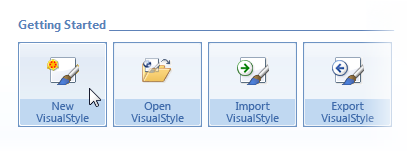
2. From the Welcome to Foxy for ASP.NET menu, underneath Getting Started, click New VisualStyle.

The New VisualStyle dialog box opens.
3. Click the drop-down arrow and select the visual style you want to base your project on. For this example, select the Arctic Fox style that appears under Included VisualStyles.
4. Complete one of the following:
• If you want to create a project with all of the included controls, leave the Select All check box selected.
OR
• To choose only one control or to choose several controls, deselect the Select All check box and then select the box for the control(s) you wish to include in your project
5. Click OK to close the Included VisualStyles dialog box.
From the Foxy for ASP.NET Button
Complete the following steps:
1. Launch the Foxy for ASP.NET application.
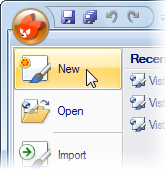
2. Click the Foxy for ASP.NET button to open the application menu.
3. In the application menu, click New.

The New VisualStyle dialog box opens.
4. Click the drop-down arrow and select the visual style you want to base your project on. For this example, select the Arctic Fox style that appears under Included VisualStyles.
5. Complete one of the following:
• If you want to create a project with all of the included controls, leave the Select All check box selected.
OR
• To choose only one control or to choose several controls, deselect the Select All check box and then select the box for the control(s) you wish to include in your project
6. Click OK to close the Included VisualStyles dialog box.
From the VisualStyles Pane
You can create a new project with the full contents of a visual styles folder, which will include every control using that visual style, or you can create a new project consisting of only one control.
Creating a Project with All Controls
Complete the following steps:
1. Under Included VisualStyles, right-click the visual style you want to base your project on to open its context menu. For this example, select ArcticFox.
2. From the context menu, select Copy to Custom.
3. A copy of the chosen visual style folder appears under Custom VisualStyles; the new folder is named ArcticFox-Custom1. If you expand the node next to the new style, you will see that it contains several controls.
Creating a Project with One Control
Complete the following steps:
1. Under Included ViualStyles, expand the node next to the visual style you want to base your project on. For this example, select ArcticFox.
The visual style’s node expands, revealing all of the controls that contain that visual style.
2. Right-click the control you wish to add to your project to open its context menu.
3. From the context menu, select Copy to Custom.
4. A copy of the chosen visual style appears under Custom VisualStyles; the new folder is named ArcticFox-Custom1. If you expand the node next to the new style, you will see that it contains only the chosen control.
|
