To add a custom visual style, complete the following:
Part I: Create a Visual Studio Project with a C1ToolBar Control
Complete the following steps:
1. Open Visual Studio 2005 or Visual Studio 2008.
2. Create an AJAX-Enabled ASP.NET Web site project.
3. Click the Design button to enter Design view.
4. From the Toolbox, add a C1ToolBar control and a ScriptManager control to your project.
5. Click the
C1ToolBar control’s smart tag ( ) to open the C1ToolBar Tasks menu and
then click Edit ToolBar.
The C1ToolBar Designer Form opens.
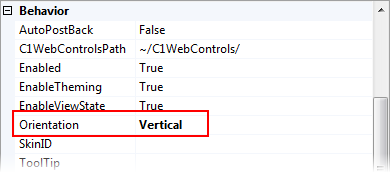
6. In the C1ToolBar Designer Form’s properties grid, set the C1ToolBar control’s Orientation property to Vertical.

7. On the C1ToolBar
Designer Form’s toolbar, click the Add Child Item button ![]() three times to
add three buttons to the toolbar.
three times to
add three buttons to the toolbar.
8. Click OK to close the C1ToolBar Designer Form.
Part II: Add the Custom Visual Style Files to the Visual Studio Project
Complete the following steps:
1. In order to add a custom visual style to your project, you must first create new folders. To do this, follow these steps:
a. In the Solution Explorer window, right-click on your project to open its context menu and select New Folder. Name the new folder "VisualStyles".
b. Add a new folder underneath the newly created VisualStyles folder and name it "TutorialStyle".
c. Add another folder under the TutorialStyle folder that you made in the last step and name it “C1ToolBar”. Your folder hierarchy will match the following image:

2. Add the custom .css file to the project by completing the following steps:
a. Right-click the C1ToolBar folder and select Add Existing Item to open the Add Existing Item dialog box.
b. Navigate to the location of the TutorialStyle project, select the CSS file, and click OK to add the file to the project folder. If you kept the default installation settings for Foxy for ASP.NET, your project folder will be located in one of the following directories:
• In XP:
C:\Documents and Settings\[User]\My Documents\C1FoxyVSD\TutorialStyle
• In Vista:
C:\Users\[User]\Documents\C1FoxyVSD\TutorialStyle
3. Add the custom visual style’s images by completing the following steps:
a. Add a folder named "Images" underneath the C1ToolBar folder. The folder hierarchy resembles the following:

b. Right-click the Images folder to open its context menu and then select Add Existing Item to open the Add Existing Item dialog box.
c. Navigate to the location of the TutorialStyle project (see step 2b for the location) and open the Images folder.
d. Select all of the project’s images and then click OK to add the images the Images folder.
Part III: Adding the Custom Visual Style to C1ToolBar
Complete the following steps:
1. Right-click the C1ToolBar control to open its context menu and then select Properties.
2. The Properties window opens with the C1ToolBar control’s properties in focus.
3. Set the following C1ToolBar properties:
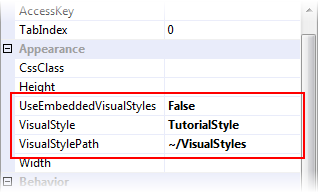
• Set the UseEmbeddedVisualStyles property to False.
• Set the VisualStyle property to “TutorialStyle”.
• Set the VisualStylePath property to “~VisualStyles”.

4. Press F5 to build the project.
Step 4 of 4 Completed
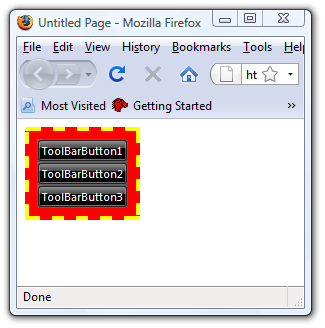
Congratulations – you have completed the Foxy for ASP.NET quick start tutorial! The result of this project will resemble the following:

|
