Complete the following steps to create a new MVC Application using C1 template:
- Select File | New | Project.
- Under Installed | Templates, select C1 | Visual C# | Web | C1 ASP.NET MVC 5 Web Application to create a C1 ASP.NET MVC Web application. For more information, see C1 ASP.NET Project Templates.
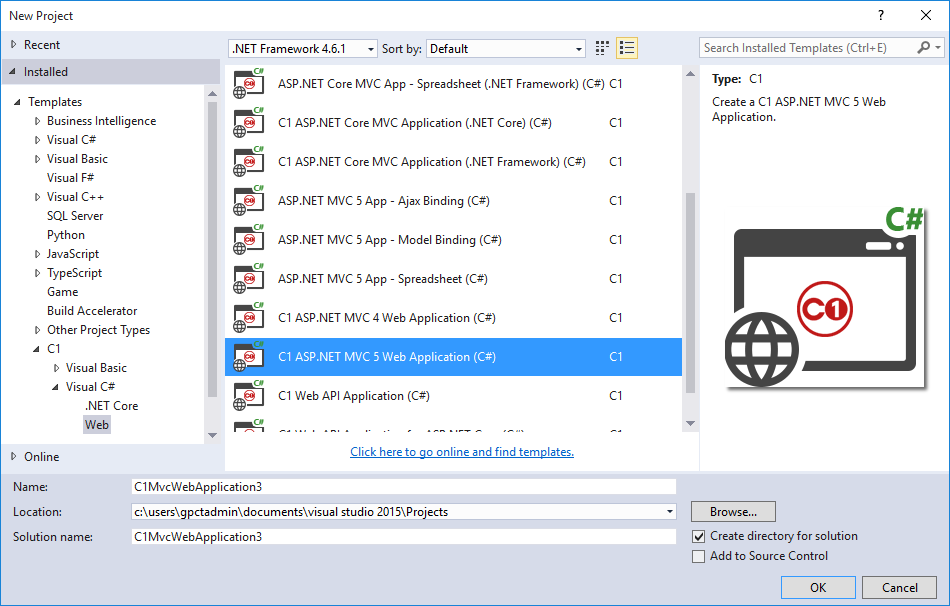
- Set a Name and Location for your application.
- Click OK. ComponentOne ASP.NET MVC Application Wizard appears.
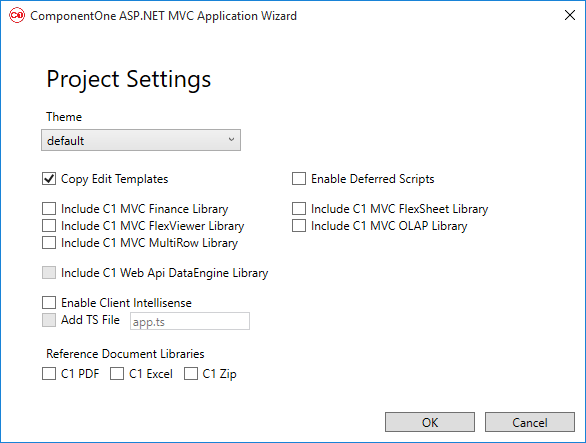
- Select a Theme and the document libraries to reference.

Note: - Check the Enable Client IntelliSense check box to use C1 MVC IntelliSense for your MVC controls in your Visual Studio application. Optionally, you can also check the Add TS File button to make use of C1 MVC IntelliSense while working with the TypeScript file. For more information, see IntelliSense Support for MVC Controls.
- Check the Include C1 MVC Finance Library check box to use FinancialChart, Include C1 MVC FlexViewer Library to use FlexViewer, Include C1 MVC Olap Library to use OLAP control, Include C1 MVC MultiRow Library to use MultiRow, and Include C1 MVC FlexSheet Library check box to use FlexSheet in your application. This automatically adds the namespaces in the Web.config file.
- Click OK.
- A new project configured to work with ASP.NET MVC Edition is created.
|
licenses.licx file is automatically added to your application. For more information on how to add the license file to the project, refer to Licensing. |
- Select File | New | Project in Visual Studio 2015.
- Under Installed | Templates, select C1 | Visual C# | .NET Core | C1 ASP.NET Core MVC Application to create a C1 ASP.NET MVC Web application. For more information, see C1 ASP.NET Project Templates.

- Set a Name and Location for your application.
- Click OK. ComponentOne ASP.NET MVC Application Wizard appears.
- Select a Theme.
Note: - C1 MVC controls support ASP.NET Core 2.0 Framework.
- Check the Enable Client IntelliSense check box to use C1 MVC IntelliSense for your MVC controls in your Visual Studio application. Optionally, you can also check the Add TS File button to make use of C1 MVC IntelliSense while working with the TypeScript file. For more information, see IntelliSense Support for MVC Controls.
- Check the Include C1 MVC Finance Library check box to use FinancialChart, Include C1 MVC FlexViewer Library to use FlexSheet, Include C1 MVC Olap Library to use OLAP control, Include C1 MVC MultiRow Library to use MultiRow, and Include C1 MVC FlexSheet Library check box to use FlexSheet in your application. This automatically adds the namespaces in the Web.config file.
- Click OK.
- A new project configured to work with ASP.NET Core MVC Edition is created.
- To generate the runtime license for applications created in Visual Studio, use GrapeCity License Manager Add-in available in Tools menu in Visual Studio.
However, you can also generate runtime license through C1 website:- Create a License.cs in your project (by right-clicking the Project Name in Solution Explorer and selecting Add New | Class).
- Add the license key generated on C1 website in this class.
- From the Solution Explorer, open Startup.cs file and assign the key to it (For more information on how to add license key to the project, see Licensing).
See Also