A Simple PdfViewer Application
To create a PdfViewer for LightSwitch application, start by creating a project and including a PdfViewer Screen, then pointing to the desired PDF file. This sample illustrates adding a PDF from a URL.
Create a PdfViewer for LightSwitch project
To create a new PdfViewer for LightSwitch project, complete the following steps:
1. In Visual Studio, select File | NewProject.
2. Under Installed Templates, select LightSwitch. The .NET Framework 4 must be selected in order to create a LightSwitch application.
3. Choose LightSwitch Application for the preferred language, enter a name for the application, and click OK. Your LightSwitch project is created.
4. In the Solution Explorer, right-click the project node and select Properties.
5. In the Properties window, select the Extensions tab and make sure the Microsoft LightSwitch Extensions and ComponentOne PdfViewer for LightSwitch items are selected. If desired, select the Use in new projects fields.
Add a PdfViewer Screen
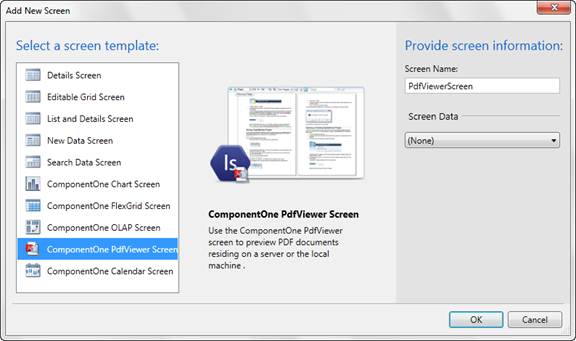
1. In the Designer, click the Screen button or right-click the Screens folder in the Solution Explorer and choose Add Screen. The Add New Screen window opens.
2. Select ComponentOne PdfViewer Screen and click OK.

Add a PDF
1. In the Designer, select the Viewer Data Location item.
2. Click the Write Code button and choose PdfViewerScreen_Created.

The code window will display:
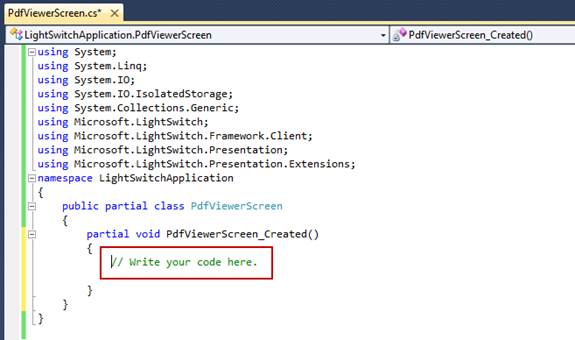
1. Replace //Write your code here with:
this.ViewerDataLocation = "http://www.microsoft.com/en-us/news/itanalyst/docs/03-01-12CRM.PDF";
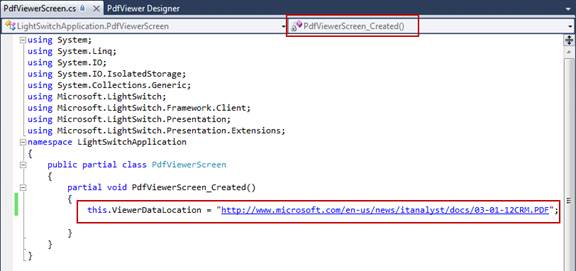
2. Run the application and it will look like this:

In debug mode, you can click the DesignScreen button to customize the page. In release mode, the Design Screen button is not available.
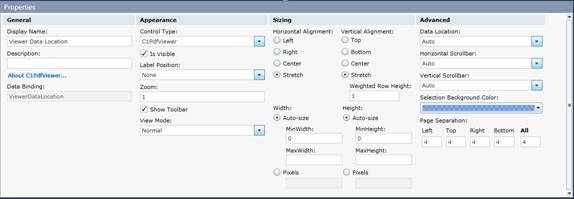
If you select the C1PdfViewer element from the left-side menu at run time, you can customize various properties, including options specific to ComponentOne's product. See Customizing the C1PdfViewer Appearance for details.