By default, the color of the C1Splitter border is determined by its visual style; however, you can change the color of that border using the BorderColor property. In this topic, you will learn how to set the BorderColor property in Design view, in Source view, and in code.
In Design View:
Complete the following steps:
1. Click
C1Splitter''s smart tag (![]() ) to open the C1Splitter
Tasks menu.
) to open the C1Splitter
Tasks menu.
2. To set the border color, complete one of the following:
• In Visual Studio 2005: Click the Border Color drop-down arrow, select the Web tab, and choose LawnGreen from the list.
OR
• In
Visual Studio 2008: Click the Border Color ellipsis button  to open the
More Colors dialog box and then, in the Value text box, enter
"Hex={7C,FC,00}".
to open the
More Colors dialog box and then, in the Value text box, enter
"Hex={7C,FC,00}".
The C1Splitter control adopts a green border.
In Source View
Add BorderColor="LawnGreen" to the <cc1:C1Splitter> so that it resembles the following:
<cc1:C1Splitter ID="C1Splitter2" runat="server" BorderColor="LawnGreen" UseEmbeddedVisualStyles="True" VisualStyle="Office2007Silver">
Switch to Design view and observe that the C1Splitter control has adopted a green border.
In Code
Complete the following steps:
1. Import the following namespace into your project:
Imports C1.Web.UI.Controls.C1Splitter
• C#
using C1.Web.UI.Controls.C1Splitter;
2. Place the following code to the Page_Load event to set the BorderColor property:
C1Splitter1.BorderColor = System.Drawing.Color.LawnGreen;
• C#
C1Splitter1.BorderColor = System.Drawing.Color.LawnGreen;
3. Run the program and observe that the C1Splitter control has adopted a green border.
![]() This Topic
Illustrates the Following:
This Topic
Illustrates the Following:
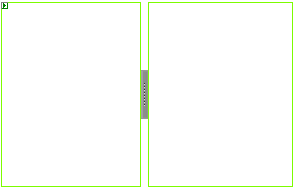
The image below shows a C1Splitter control with a green border.
|