This lesson will show you how to create root and child nodes, apply a visual style, and display check boxes next to the nodes.
1. Select the C1TreeView control and click on the smart tag to open its Tasks menu.
2. Select Edit TreeView from C1TreeView Tasks menu to open the designer.

3. Right-click on the C1TreeView item and select Add Child | C1TreeView Node to add the root to the C1TreeView control. Set the C1TreeViewNode1's Text property to "Book List".
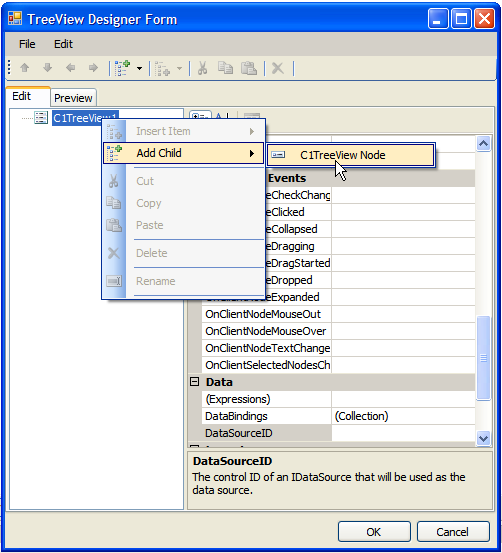
4. Right-click on Book List and select Add Child to create a child for the root node. Repeat this two more times. Three child nodes will exist under the Book List.
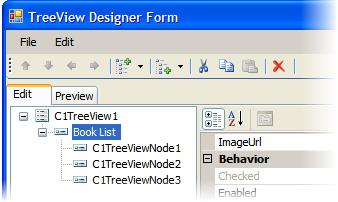
5. Select the first node under the Book List and set its Text property to "Language Books".
6. Select the second node under the Book List and set its Text property to "Security Books".
7. Select the third node under the Book List and set its Text property to "Classic Books".
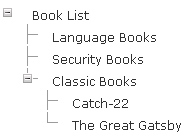
8. Right-click on the Classic Books node and select Add Child to create a child for the Classic Books node. Repeat this to create two C1TreeViewNodes under the Classic Books node.
9. Select the first node under the Classic Books node and set its Text property to "The Great Gatsby".
10. Select the second node under the Classic Books node and set its Text property to "Catch-22".
11. Right-click on Book List and select Add Child to add to add a child node.
12. Save and run your project and observe the following:
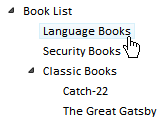
• The root node, Book List, isn't expanded since the Expanded property was set to False, by default.
• Expand the Book List and notice the child nodes you created.
• Notice the visual style is the default visual style.
13. Go back to your project in the design view and open the TreeView Designer Form.
14. Select the C1TreeView item and set the VisualStyle property to Vista.
15. Save and run your project and notice the visual style, Vista, is applied to C1TreeView.
16. Go back to your project in the Design view and open the TreeView Designer Form.
17. Select the C1TreeView item and in the Properties window, set its behavior properties to the following:
• AllowDragDrop to True
• ShowCheckBoxes to True
18. Click OK to save and close the designer.
19. Run the project and observe the following:
• Expand the Book List node and notice the check boxes next to each treeview node.
• Select any of the treeview nodes and drag it to a new location.
|