Adding a Web Part to a Page
To add a ComponentOne Web Part to an existing SharePoint
page
- Open the SharePoint page.
- Click the Page tab. Click the Edit
button.
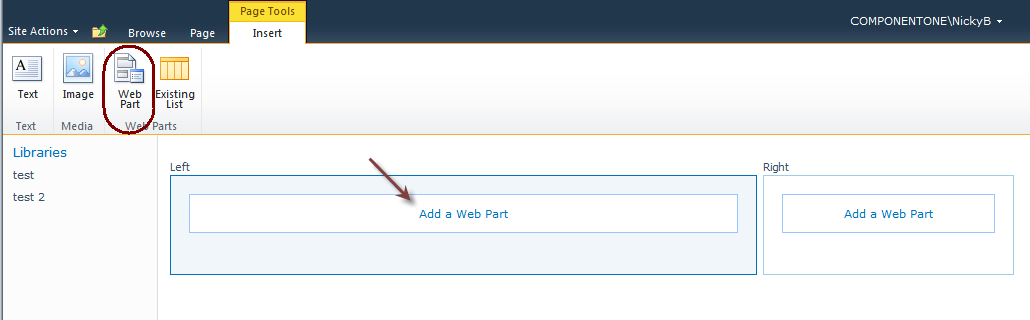
- Select the Insert tab. Click the Web Part
button.
- From the Categories column, choose ComponentOne
SharePoint Web Parts. From the Web Parts column,
pick the appropriate Web Part.
- Click the Add button.
If your SharePoint Page already has "Add Web Part" buttons
displayed, you can also click on one of those to add a ComponentOne Web
Part.
To create a new SharePoint Web Part Page
- On the Site Actions menu, choose More
Options...
- Choose Web Part Page as the Type (you
will need to scroll down). Click the Create button.
- Name the page and choose a Layout. Choose the
Library your new page should be stored in using the Document
Library drop-down. Click Create.
- Click any of the "Add a Web Part" buttons on the
page to select a ComponentOne SharePoint Web Part.
Editing a SharePoint
Page
You must be in Edit mode to edit/add Web Parts, so if you
open a page and can not edit it, choose the Page tab and click
the Edit Page button.

To easily move through your document tree, use the Navigate
button.
