In this tutorial you'll learn how to create a Cascading Style Sheet (CSS) to apply the styles to C1WebTabStrip. You are going to use the CSSClass property (inherited from Style) to apply the CSS styles to the C1WebTabStrip's groups' and items' styles.
This tutorial is divided into two lessons. It's is recommended that you follow each lesson sequentially from start to finish. The two lessons in this tutorial include the following:
· Programmatically Creating the C1WebTabStrip
· Adding a Cascading Style Sheet
Programmatically Creating the C1WebTabStrip
1. Repeat the steps in the lesson, Adding a C1WebTabStrip to the PlaceHolder Control.
2. Repeat the steps in the lesson, Adding Tab Headers and Items to the Tabstrip.
At this point, your project should include the following code.
Imports C1.Web.Command
Imports System.Drawing
Dim tabstrip As New C1WebTabStrip()
PlaceHolder1.Controls.Add(tabstrip)
tabstrip.Groups.Add(New C1WebTabStripGroup("Travel"))
tabstrip.Groups.Add(New C1WebTabStripGroup("Maps"))
tabstrip.Groups(0).Items.Add(New C1WebTabStripItem("Expedia", "http://www.expedia.com"))
tabstrip.Groups(0).Items.Add(New C1WebTabStripItem("Orbitz", "http://www.orbitz.com"))
tabstrip.Groups(1).Items.Add(New C1WebTabStripItem("Map Quest", "http://www.mapquest.com"))
tabstrip.Groups(1).Items.Add(New C1WebTabStripItem("Maps", "http://www.maps.com"))
· C#
using C1.Web.Command;
using System.Drawing;
C1WebTabStrip tabstrip = new C1WebTabStrip();
PlaceHolder1.Controls.Add(tabstrip);
tabstrip.Groups.Add(new C1WebTabStripGroup("Travel"));
tabstrip.Groups.Add(new C1WebTabStripGroup("Maps"));
tabstrip.Groups[0].Items.Add(new C1WebTabStripItem("Expedia", @"http://www.expedia.com"));
tabstrip.Groups[0].Items.Add(new C1WebTabStripItem("Orbitz", @"http://www.orbitz.com"));
tabstrip.Groups[1].Items.Add(new C1WebTabStripItem("Map Quest", @"http://www.mapquest.com"));
tabstrip.Groups[1].Items.Add(new C1WebTabStripItem("Maps", @"http://www.maps.com"));
· Delphi
var
tabstrip: C1WebTabStrip;
begin
tabstrip := C1WebTabStrip.Create;
PlaceHolder1.Controls.Add(tabstrip);
tabstrip.Groups.Add(C1WebTabStripGroup.Create('Travel'));
tabstrip.Groups.Add(C1WebTabStripGroup.Create('Maps'));
tabstrip.Groups[0].Items.Add(C1WebTabStripItem.Create('Expedia', 'http://www.expedia.com'));
tabstrip.Groups[0].Items.Add(C1WebTabStripItem.Create('Orbitz', 'http://www.orbitz.com'));
tabstrip.Groups[1].Items.Add(C1WebTabStripItem.Create('Map Quest', 'http://www.mapquest.com'));
tabstrip.Groups[1].Items.Add(C1WebTabStripItem.Create('Maps', 'http://www.maps.com'));
Run the Project and Observe the Tab Headers
· Click on the Travel tab header and notice that it displays the tab items in the Travel group.

Notice how there is no styles present since we did not apply the style properties yet. The two groups, Travel and Maps appear close together since the padding was not applied yet.
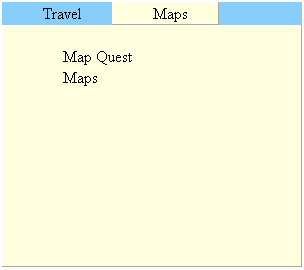
· Click on the Maps tab header and notice that it displays the tab items in the Map group.

Adding a Cascading Style Sheet
You are going to create a cascading style sheet and use the same styles that we used earlier in this lesson.
1. Close the running application.
2. Right-click on the project node in the solution explorer and select Add New Item from its context menu. The Add New Item dialog box appears.
3. Select the Style Sheet from the Add New Item dialog box. Click on the Add button.
4. Open the web form and switch to Source view. The following line of code must be entered in order for the StyleSheet.css file to connect to the web form. Insert the code right after the <head> tag in the HTML page.
<link href="StyleSheet.css" type="text/css" rel="stylesheet">
5. Open the SyleSheet.css file and enter the following :
.ActiveHeader, .InactiveHeader, .MouseOverInactiveHeader
{
padding-top:0px;
padding-bottom:0px;
padding-left:40px;
padding-right:30px;
}
.ActiveHeader
{
border: outset 1px;
background-color: #FFFFE0;
}
.InactiveHeader
{
border: solid 1px #87CEFA;
background-color: #87CEFA;
}
.MouseOverInactiveHeader
{
border: solid 1px #87CEFA;
background-color: #87CEFA;
}
.TabStrip
{
background-color: #87CEFA;
height: 200px;
width: 300px;
}
.Group
{
padding: 20px;
border: outset 1px;
background-color: #FFFFE0;
height: 200px;
}
.TabStripLinkItem
{
padding-left: 40px;
padding-right: 30px;
6. Add the following code in the Page_Load event. This code adds the class names we created in the style sheet to each of the tabstrip, GroupStyle, ActiveHeaderStyle, MouseOverActiveHeaderStyle, InactiveHeaderStyle, MouseOverInactiveHeaderStyle, and ItemStyle objects.
tabstrip.CssClass = "TabStrip"
tabstrip.GroupStyle.CssClass = "Group"
tabstrip.ActiveHeaderStyle.CssClass = "ActiveHeader"
tabstrip.MouseOverActiveHeaderStyle.CssClass = "ActiveHeader"
tabstrip.InactiveHeaderStyle.CssClass = "InactiveHeader"
tabstrip.MouseOverInactiveHeaderStyle.CssClass = "MouseOverInactiveHeader"
tabstrip.ItemStyle.CssClass = "TabStripLinkItem"
· C#
tabstrip.CssClass = "TabStrip";
tabstrip.GroupStyle.CssClass = "Group";
tabstrip.ActiveHeaderStyle.CssClass = "ActiveHeader";
tabstrip.MouseOverActiveHeaderStyle.CssClass = "ActiveHeader";
tabstrip.InactiveHeaderStyle.CssClass = "InactiveHeader";
tabstrip.MouseOverInactiveHeaderStyle.CssClass = "MouseOverInactiveHeader";
tabstrip.ItemStyle.CssClass = "TabStripLinkItem";
· Delphi
tabstrip.CssClass := 'TabStrip';
tabstrip.GroupStyle.CssClass := 'Group';
tabstrip.ActiveHeaderStyle.CssClass := 'ActiveHeader';
tabstrip.MouseOverActiveHeaderStyle.CssClass := 'ActiveHeader';
tabstrip.InactiveHeaderStyle.CssClass := 'InactiveHeader';
tabstrip.MouseOverInactiveHeaderStyle.CssClass := 'MouseOverInactiveHeader';
tabstrip.ItemStyle.CssClass := 'TabStripLinkItem';
end;
Run the Project and Observe the New Styles
· The C1WebTabStrip appears identical to the original one we created since we applied the same styles.
Congratulations for your Successful Completion of this Lesson!
In this tutorial you learned how to apply CSS styles to C1WebTabStrip using the CSSClass property.
If you would like to learn how to programmatically add a control to content area for each tab in the C1WebTabStrip you can try the following lesson, Adding a Control in the Content Item of the C1WebTabStrip.
Send comments about this topic to ComponentOne. Copyright © ComponentOne LLC. All rights reserved. |