Editing a C1DataGrid
The data in a C1DataGrid Web Part can be edited by end users — with the
proper settings, they can edit the data within a cell, delete rows, and add new
rows to the grid.
Users can also sort, filter, group data, and resize columns and
rows, see Sorting,
Filtering, Grouping, and Resizing a C1DataGrid.
To allow editing of a C1DataGrid
- Open the On-Board Designer. (See Using the On-Board Designer.)
- Click the Data Source tab.
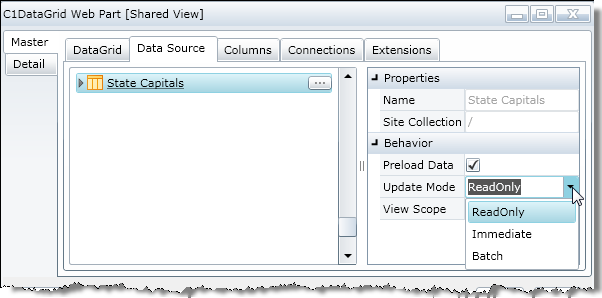
- Set the Update Mode to Immediate or
Batch.
If you choose Immediate, the user can double-click in a
cell and make edits that will be saved when they exit that cell. If you choose
Batch, a Save Changes button will appear at
the bottom of the grid. This button must be clicked or the changes made will
not be saved. No edits can be made in ReadOnly mode.

(If your data source has a hierarchy of
folders, the View Scope drop-down allows you to set the files
and folders that will be displayed. Default will show
the files/subfolders of a specific folder, Recursive will
show all files of all folders, RecursiveAll will
show all files and folders, FilesOnly will show only the
files of a specific folder.)
- Click the DataGrid tab.
- To allow:
- Editing of the grid— select the Allow
Editing check box
- Deleting a row from the grid — select the
Allow Delete check box
- Adding a new row to the grid — select the Allow
Add New check box.
- Click the Save Web Part button.
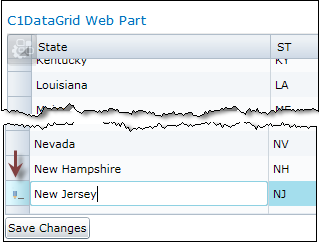
When the end user edits a cell, an editing icon will appear in the row
selector column (far left). The Save Changes button will appear
if the Update Mode was set to Batch
(Data Source tab). To delete the entire row, click on
the row selector and click the Delete button on your
keyboard.

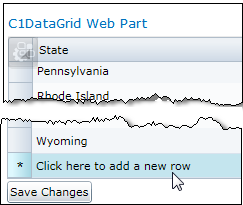
If the Allow Add New check box is selected (DataGrid
tab), new rows can be added to the grid by clicking on
Click here to add a new row.

Note: You can choose to only allow the editing of
specific columns in your C1DataGrid. You can do so using the Allow
Editing check box in the Columns tab. See Customizing the
Behavior and Display of Your Grid.


